How to Enable and Set Up the Magic Link Feature
Updated: March 4, 2025
Ever had customers frantically emailing to reschedule their tour at the last minute? Or frustrated guests who can’t make it and want a refund? Managing booking changes can be a time-consuming headache—but it doesn’t have to be.
With TicketingHub’s Magic Link feature, customers can handle cancellations, reschedules, and voucher conversions themselves—without flooding your inbox. It’s a win-win: they get the flexibility they need, and you get fewer support requests bogging down your team.
Step-by-Step Guide |
|
|---|---|
| |
| |
| |
| |
| |
| |
| |
| |
|
How to Enable the Magic Link Feature
**
Step 1: Access Settings
- Go to Settings in your TicketingHub dashboard.
- Navigate to the Advanced tab.
Step 2: Configure Booking Management Options
- Under Booking Managed by Customer, check the boxes for the actions you want to allow:
- Cancel and refund booking – Customers can cancel their booking and receive a refund.
- Change booking to voucher – Allows customers to convert their booking into a voucher for future use.
- Change booking date or time – Enables customers to modify their booking to a different date or time.
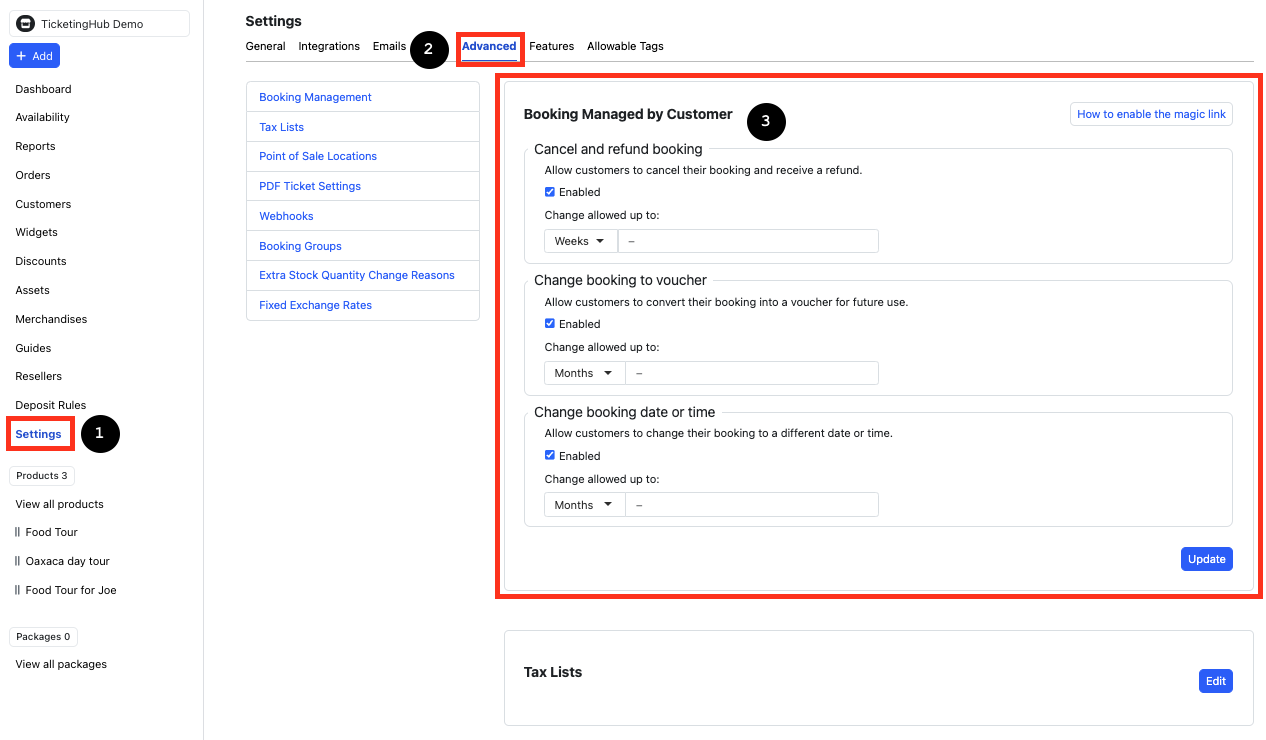
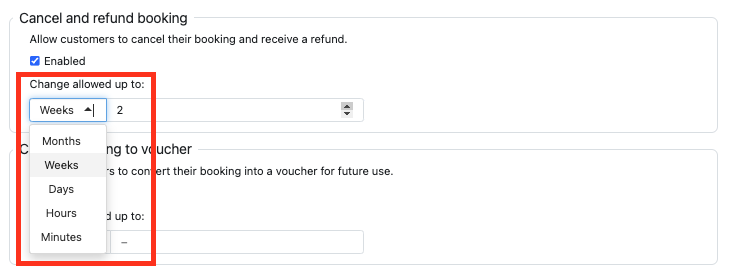
- Set the timeframe within which customers can make changes using the Change allowed up to box (e.g., days, hours, weeks, or months before the event).
Step 3: Save Your Settings
Click the Update button to apply the Magic Link settings.

** ---
How to Set Up the Magic Link in Booking Confirmation Emails
After enabling the Magic Link feature, it’s now time to set it up and display it in your booking confirmation emails. Here’s how:
Step 1: Insert the Magic Link in Your Email Template
- **Go to the Product **in your TicketingHub dashboard.
- Navigate to the Emails tab.
- Locate the Ticket Booking Confirmation Email box.
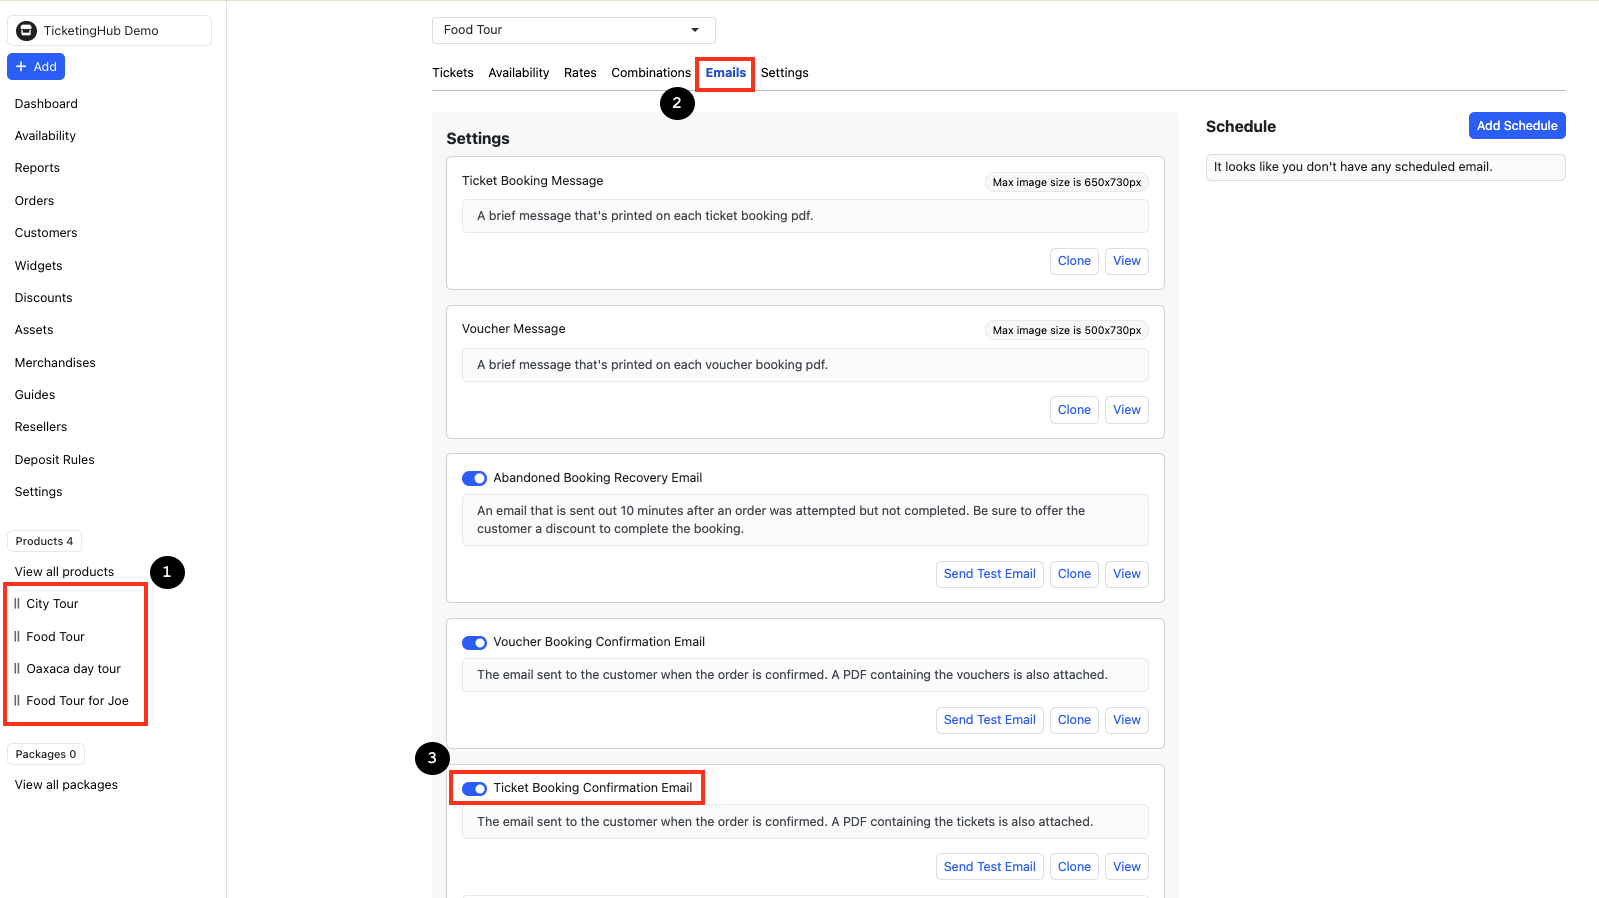
- Click on View > Edit.
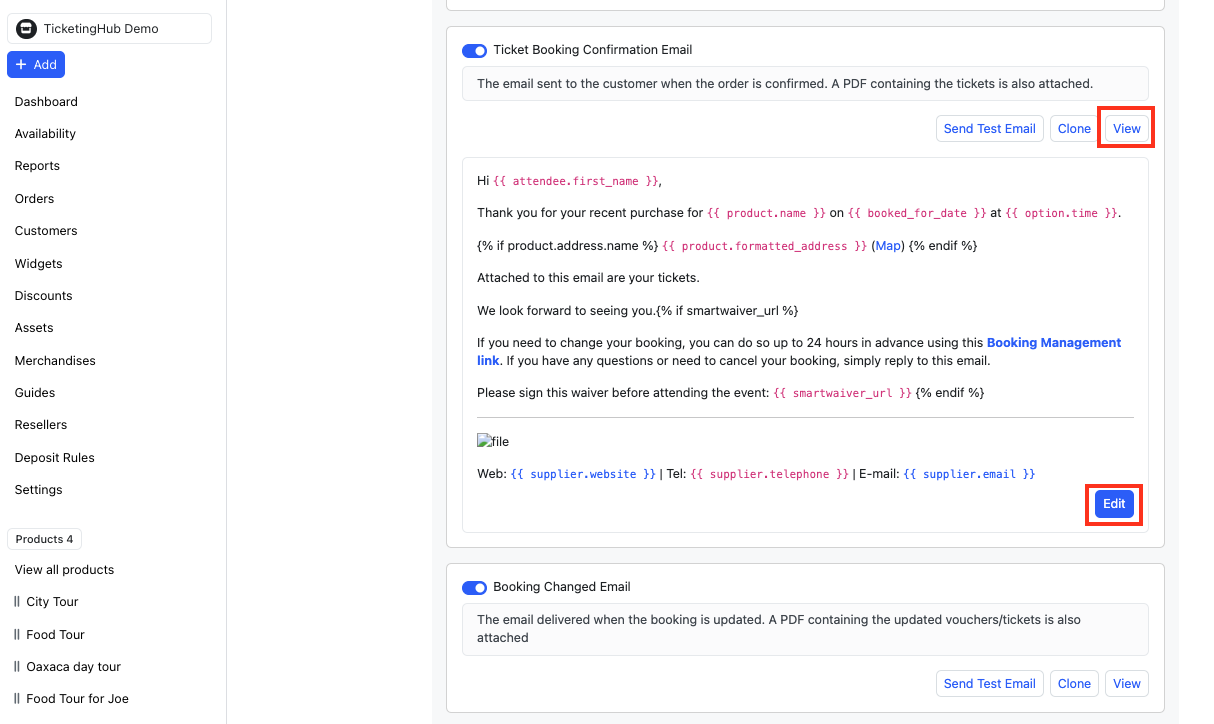
- Insert the following code where you want the Magic Link to appear:
[PERSONALIZE ANCHOR TEXT HERE]({{ manage_booking_url }})
Step 2: Customize the Link Text
Here’s an example of how one of our food tour clients personalized their message:

Then after clicking on ‘Save Changes’ you will see a preview of how it looks when sent to the customer’s email:
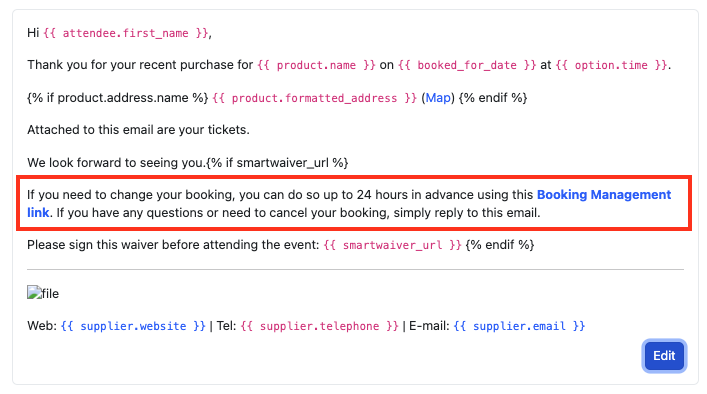
Since these are your tours, give the message a personal touch!
Here are a few sample ideas for the anchor text:
- Manage Your Booking Here
- Need to Reschedule? Click Here
- Change Your Booking to a Voucher with a Click
- Modify Your Reservation Anytime
- Click Here to Adjust Your Tour Date
Step 3: Save and Test Your Changes
- Click Save Changes
- Test it by clicking Send Test Email
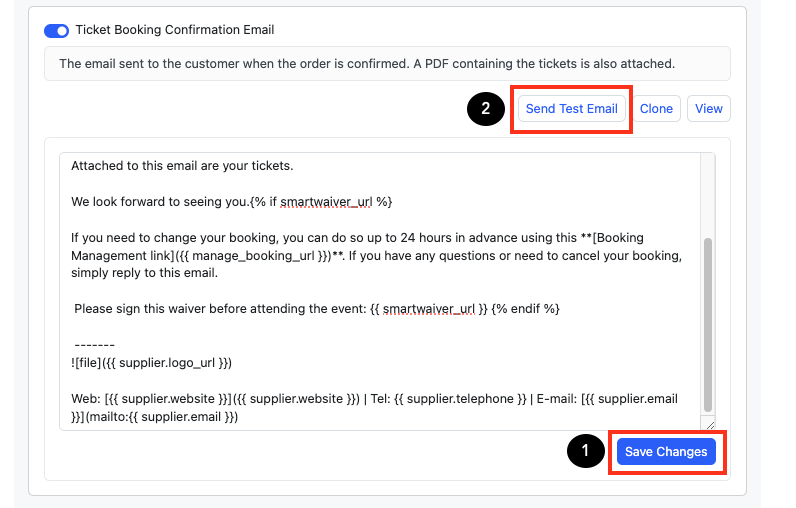
- Enter a sample booking number to send a test email and see how it looks on your customers’ end.

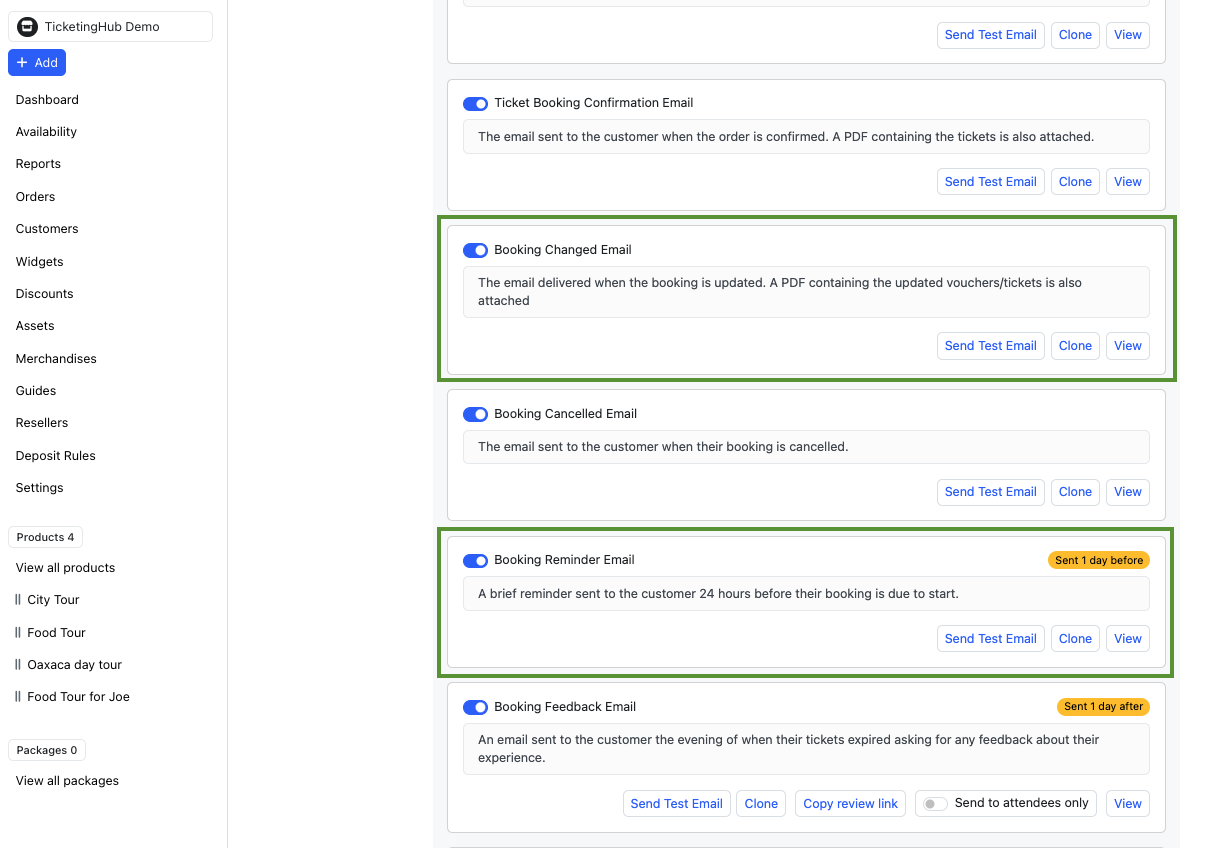
Bonus: Add the Magic Link to Other Emails
You can also include the Magic Link in other email templates to make things even easier for your customers:
- Booking Changed Email – Sent when a booking is updated, including an attached PDF with the updated vouchers/tickets.
- Booking Reminder Email – A brief reminder sent 24 hours before the customer’s booking is due to start.
To do this, simply insert the same Magic Link code, personalize the message, and save your changes.
You can locate these email templates on the same page. (See picture below)
- * ---
All Set!
With the Magic Link enabled and set up in your emails, your customers can now manage their own bookings hassle-free, reducing your workload while enhancing their experience. If you need further assistance, we’re always here to help!
**
**
Updated on: 04/03/2025
Thank you!