How to Manage Asset Availability
Date Updated: February 23, 2025
**Managing asset availability might sound like a dull chore, but if you’re running boat tours, private food tours, or escape game rooms, it’s your secret weapon for keeping things smooth and stress-free.
This guide is your go-to manual for tracking and allocating shared resources—think boats, tour guides, or even game room slots—without breaking a sweat.
Whether you’re juggling multiple events or just trying to avoid that awkward “Oops, we’re overbooked!” moment, these simple steps will help you stay on top of things, delight your customers, and keep your sanity intact.
Let’s get started!
Steps on How to Manage Asset Availability |
|---|
Step-by-Step Guide
1: Create an Asset
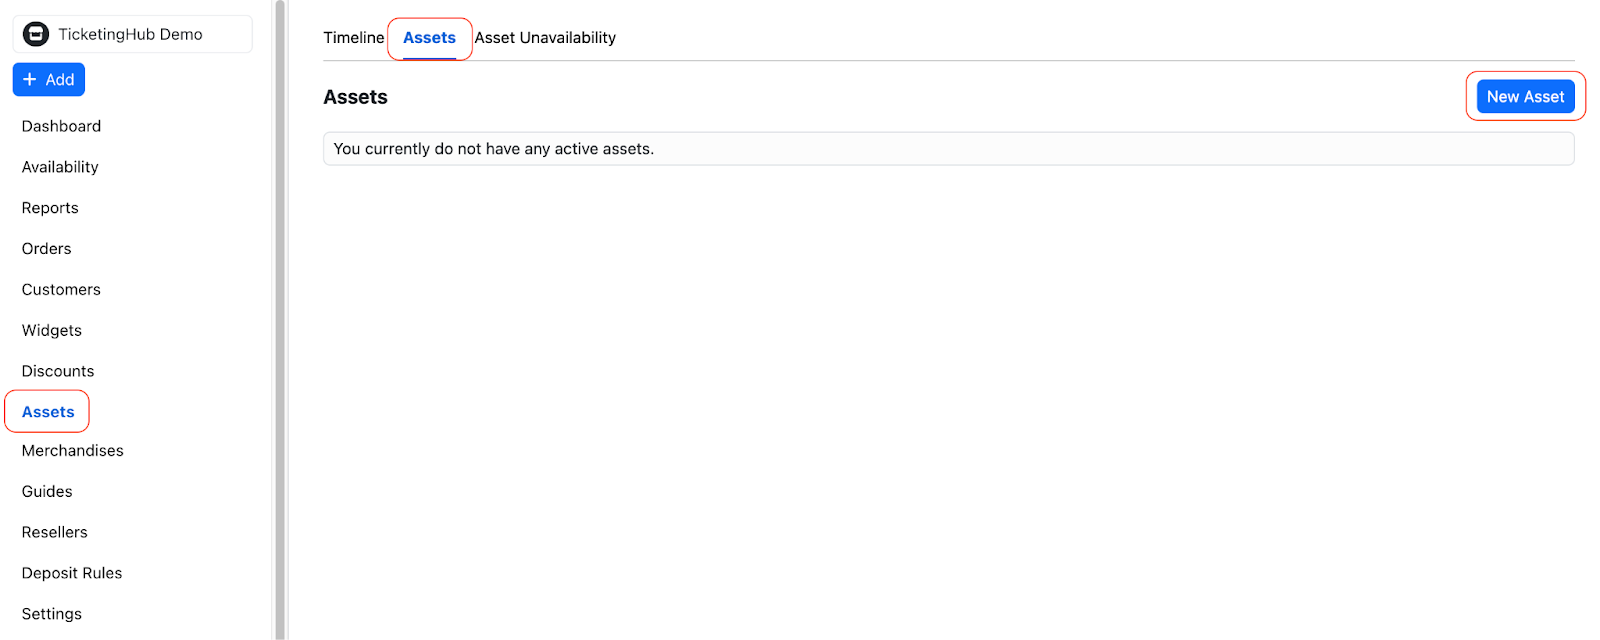
- Access the Asset Creation Page:
- Click on the Assets tab from the left-hand menu.
- Open the Assets menu at the top of the page.
- Click the New Asset button.
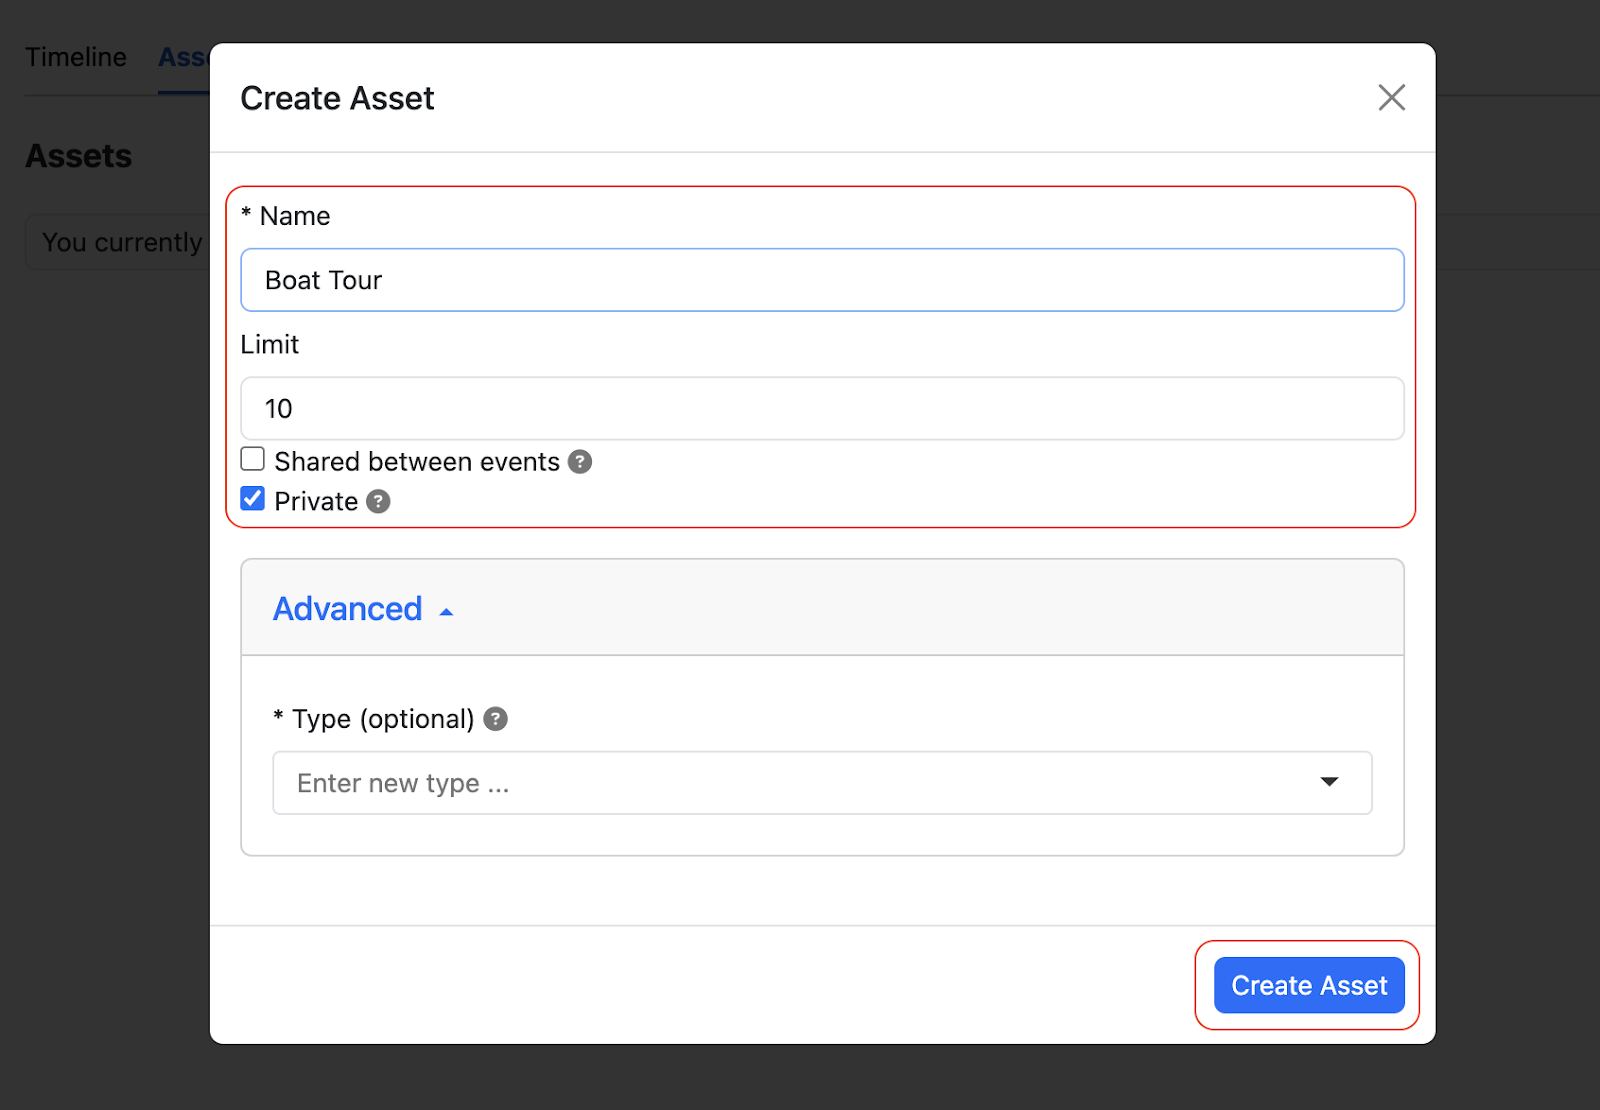
- Set Asset Details:
- Assign a name to the asset (e.g., “Guide,” “Boat,” or “Car”).
- Specify its capacity (e.g., a guide for 10 people or a boat for 20 people).
- Choose Sharing Options. Decide whether the asset can:
- Be shared between events (e.g., for multiple overlapping bookings).
- Be reserved exclusively for one booking (set as private).
- Assign Asset Type (Advanced). Use asset types to manage bookings more accurately:
- For example, if one scooter fits two people, a group of six will automatically be allocated three scooters.
- Similarly, a group of seven people will be assigned two rooms for escape rooms that fit six people.
2: Assign Assets to Products
- Link Assets to Products:
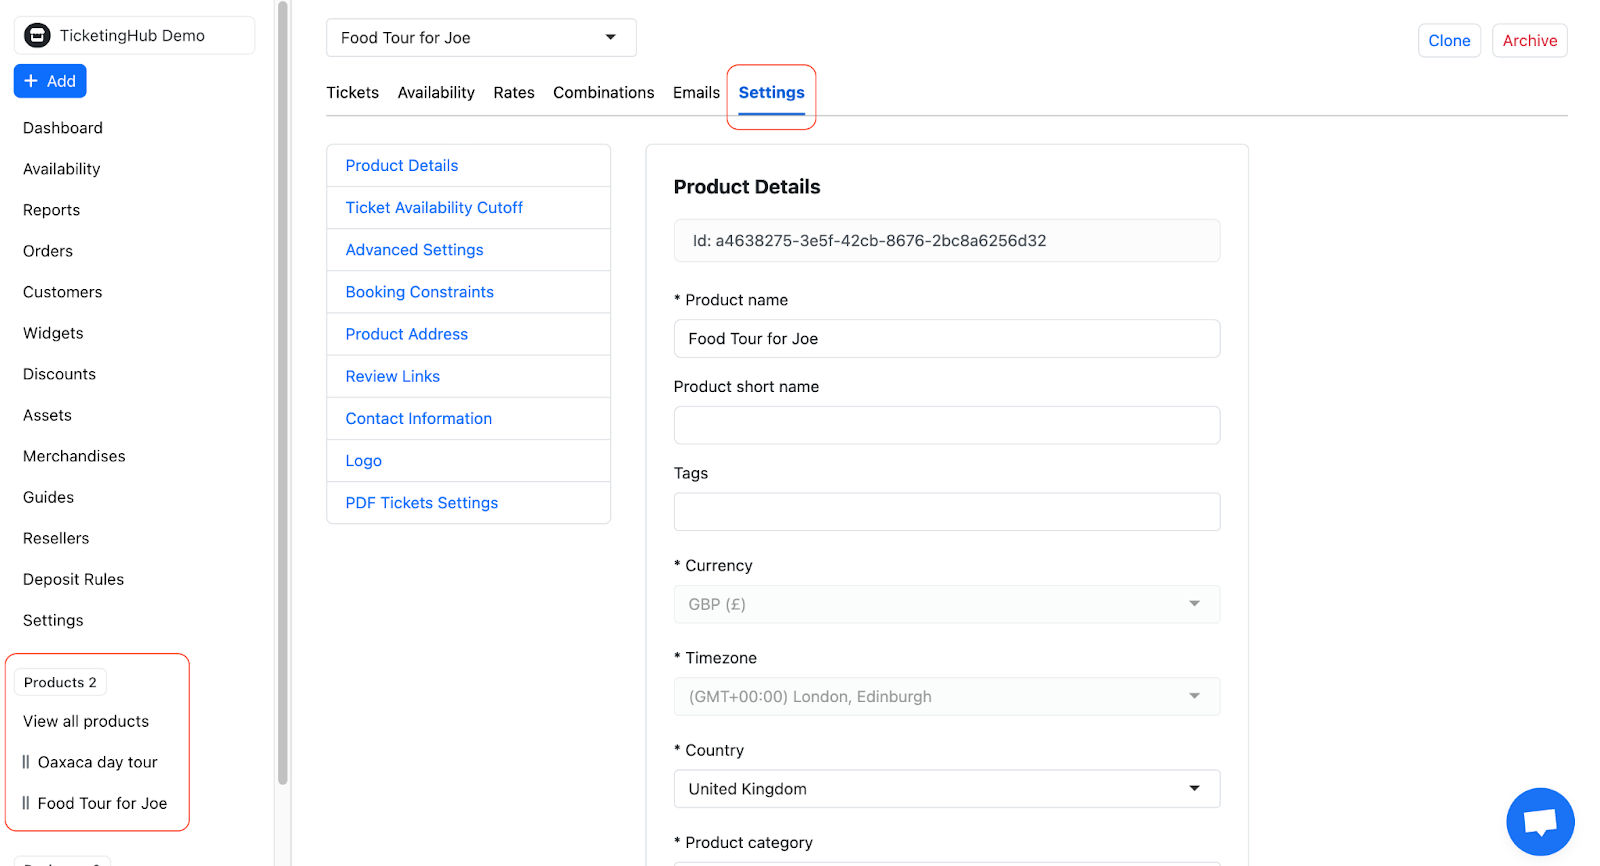
- Open the product in Settings.
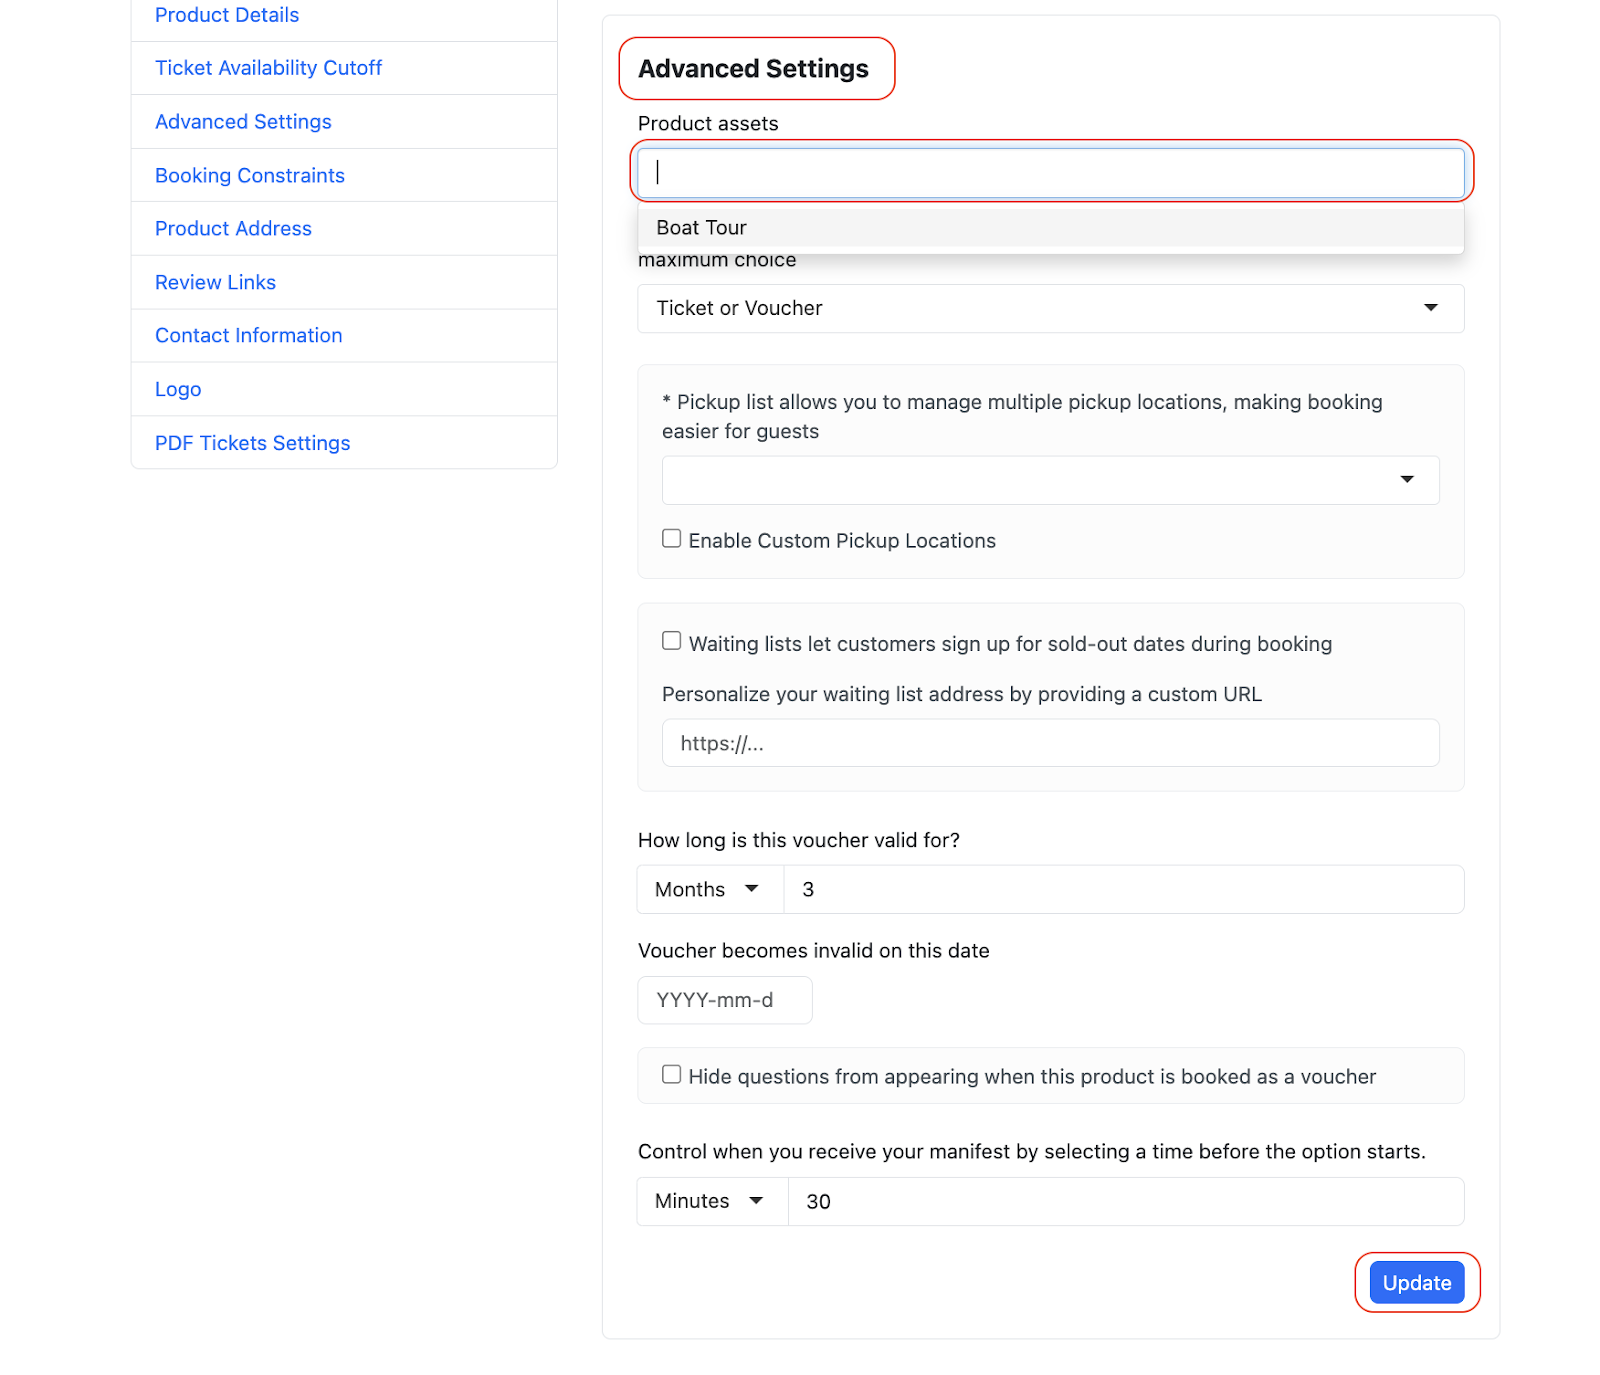
- Scroll down to the Advanced Settings section.
- Under Product Assets, assign the relevant asset.
- Save changes by clicking Update.
- Repeat for All Relevant Products: Repeat this process for each product to avoid double-booking shared assets.
3: Monitor Asset Usage on the Timeline
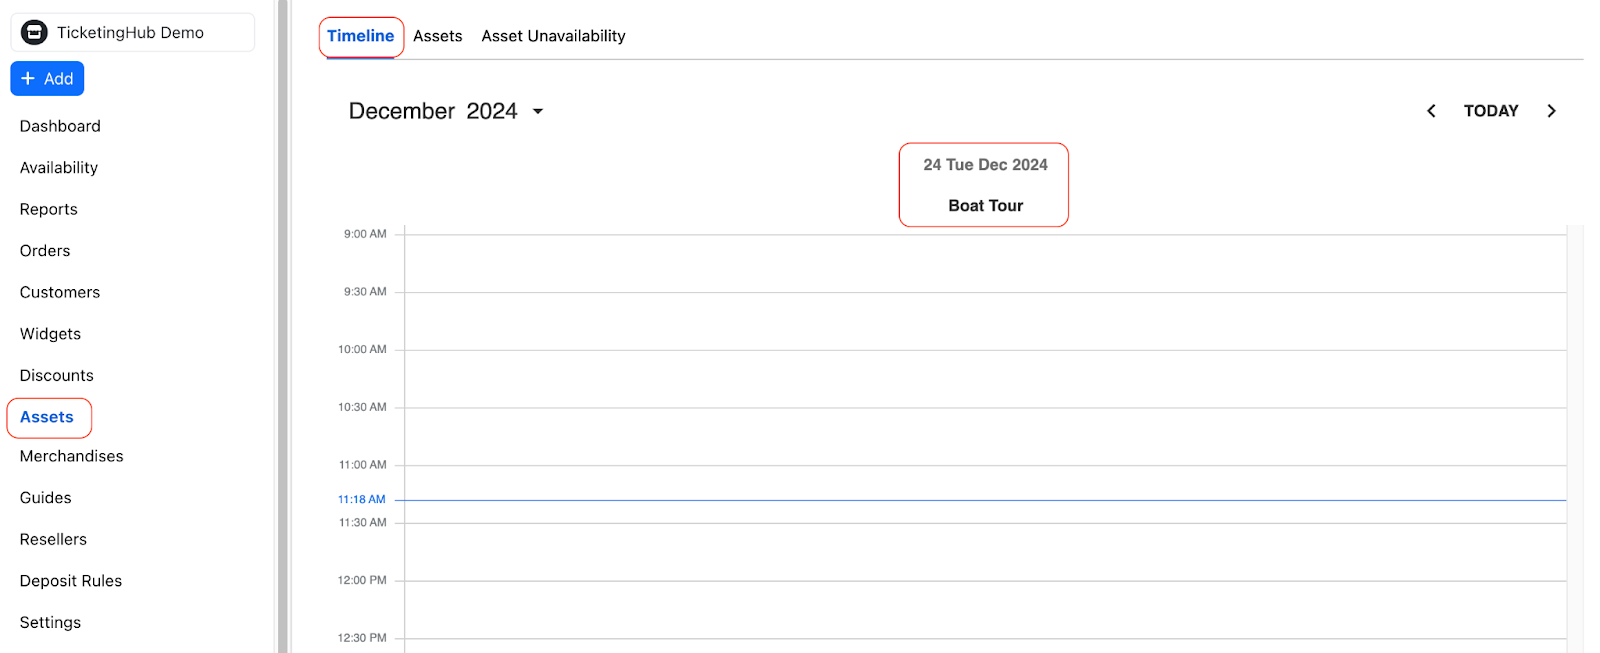
- Check the Timeline:
- Go to the Assets tab.
- Review the timeline to see all active assets and their current bookings.
4: Set Asset Unavailability

Got a boat out for repairs or a room that’s temporarily off-limits? No problem! Just mark it as unavailable for the days it’s out of action. Here’s how to do it:
- Mark an Asset as Unavailable:
- Go to the Assets tab.
- Go to Asset Unavailability.
- Click Add Unavailability.

- Set the Dates:
- Choose the asset you want to set as unavailable.
- Select the specific dates or time period for unavailability.
- Save changes, click on the Add Unavailability button.
5: Resolve Incomplete Asset Allocations
Deallocated an asset? Time to let your customers know and help them adjust their plans. Don’t worry, it’s simple! Just follow these steps:
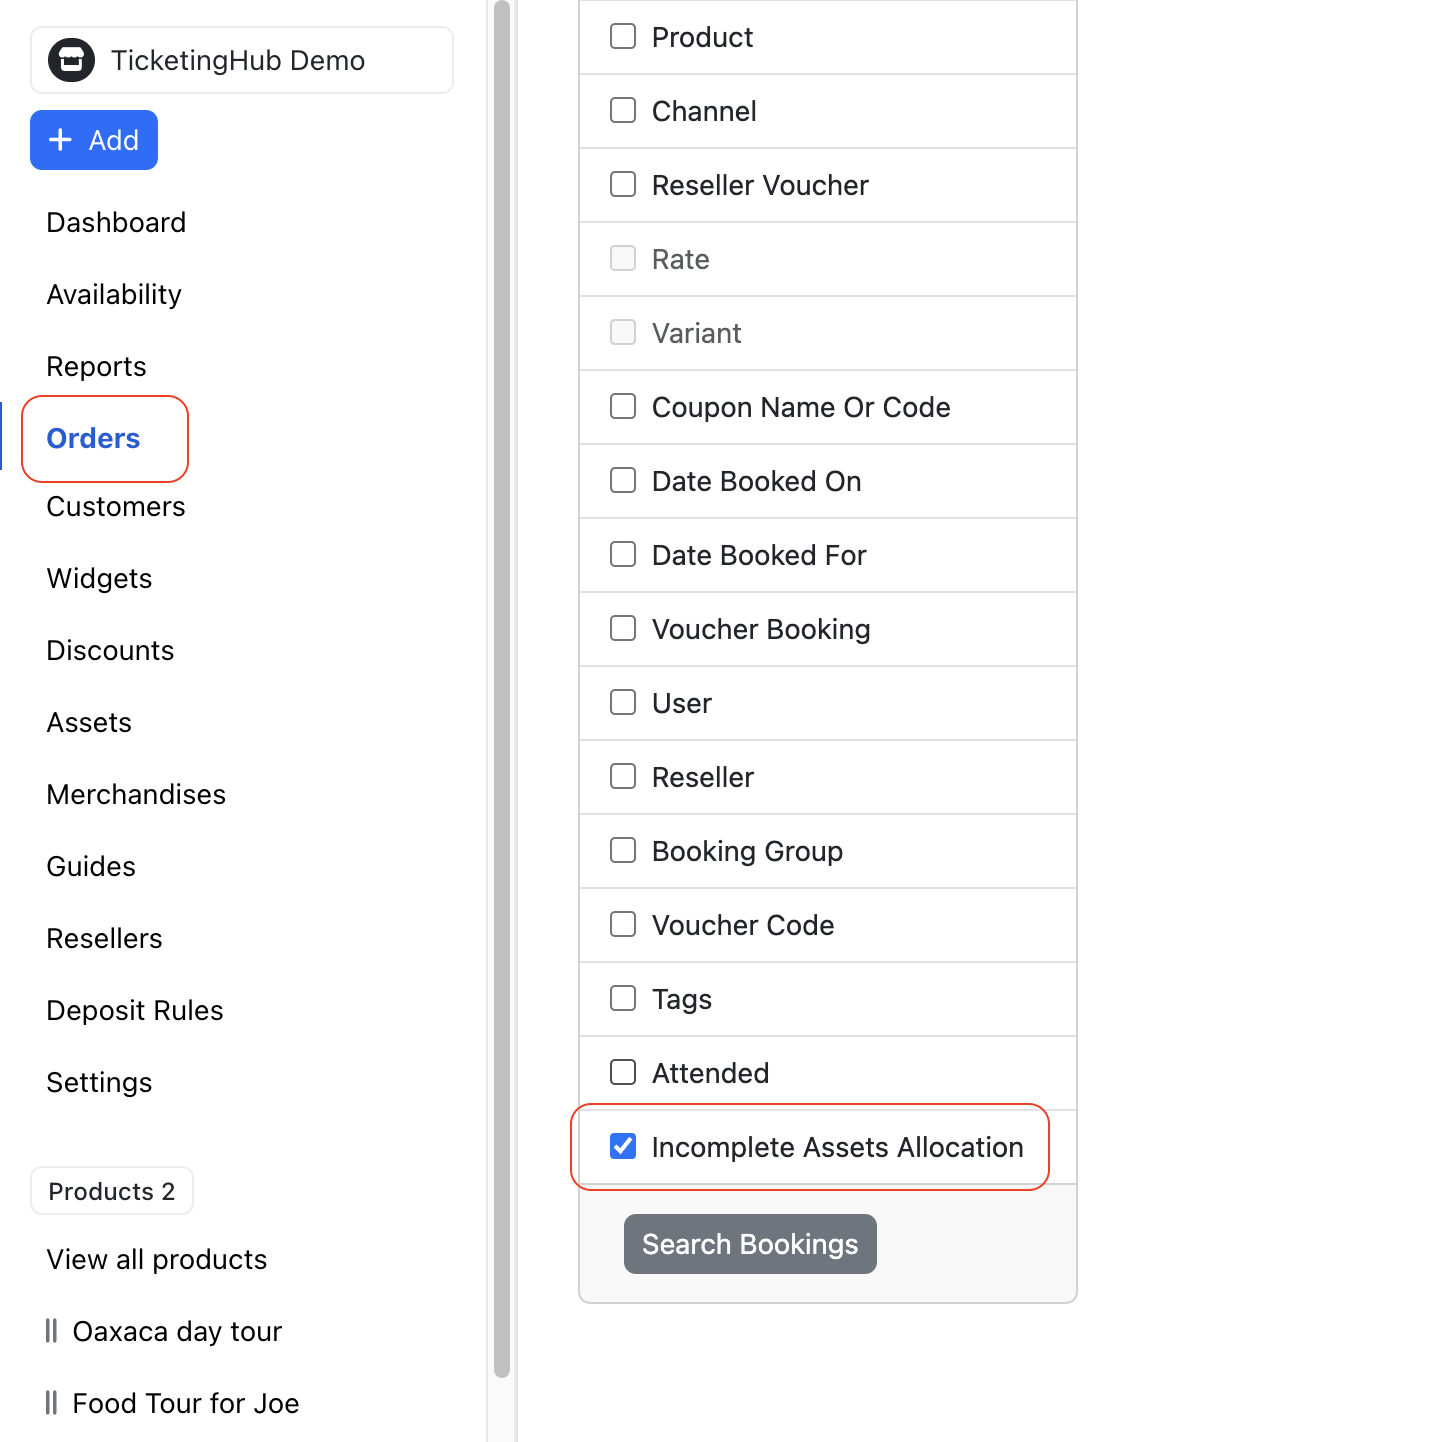
- Find Incomplete Allocations:
- Go to the Orders tab.
- Use the Filter menu to select Incomplete Asset Allocation.
- Review bookings that have been affected by the asset’s unavailability.
- Contact Affected Customers:
- Notify customers of the issue and help reschedule or adjust their bookings.
- Proactive communication can help reduce dissatisfaction.
Final Thoughts
Mastering asset management might not make you a superhero, but it will definitely save the day for your business—and your customers!
With these steps, you’ll dodge overbookings, cut down on chaos, and deliver the kind of smooth, hassle-free experience your clients will love (and rave about).
*Got questions or want to level up with advanced features like managing durations? *
Don’t be shy—check out our other guides or give our support team a shout. We’re here to help you keep things running like clockwork!
**
Updated on: 23/02/2025
Thank you!