How to Add a New Product or Venue and Understand Product Settings
Updated: Mar. 2, 2025
Want to add a new tour, event, or venue to TicketingHub? We’ve got you covered! Whether you’re starting from scratch or tweaking an existing setup, this guide will walk you through the process. You’ll learn how to create a new product, clone an existing one, and get familiar with key product settings—so you can manage your offerings with ease.
Whether you're launching a new experience or expanding your current offerings, these steps will help you do it quickly and efficiently. Let’s dive in!
How to Add a New Product or Venue and Understand Product Settings |
|---|
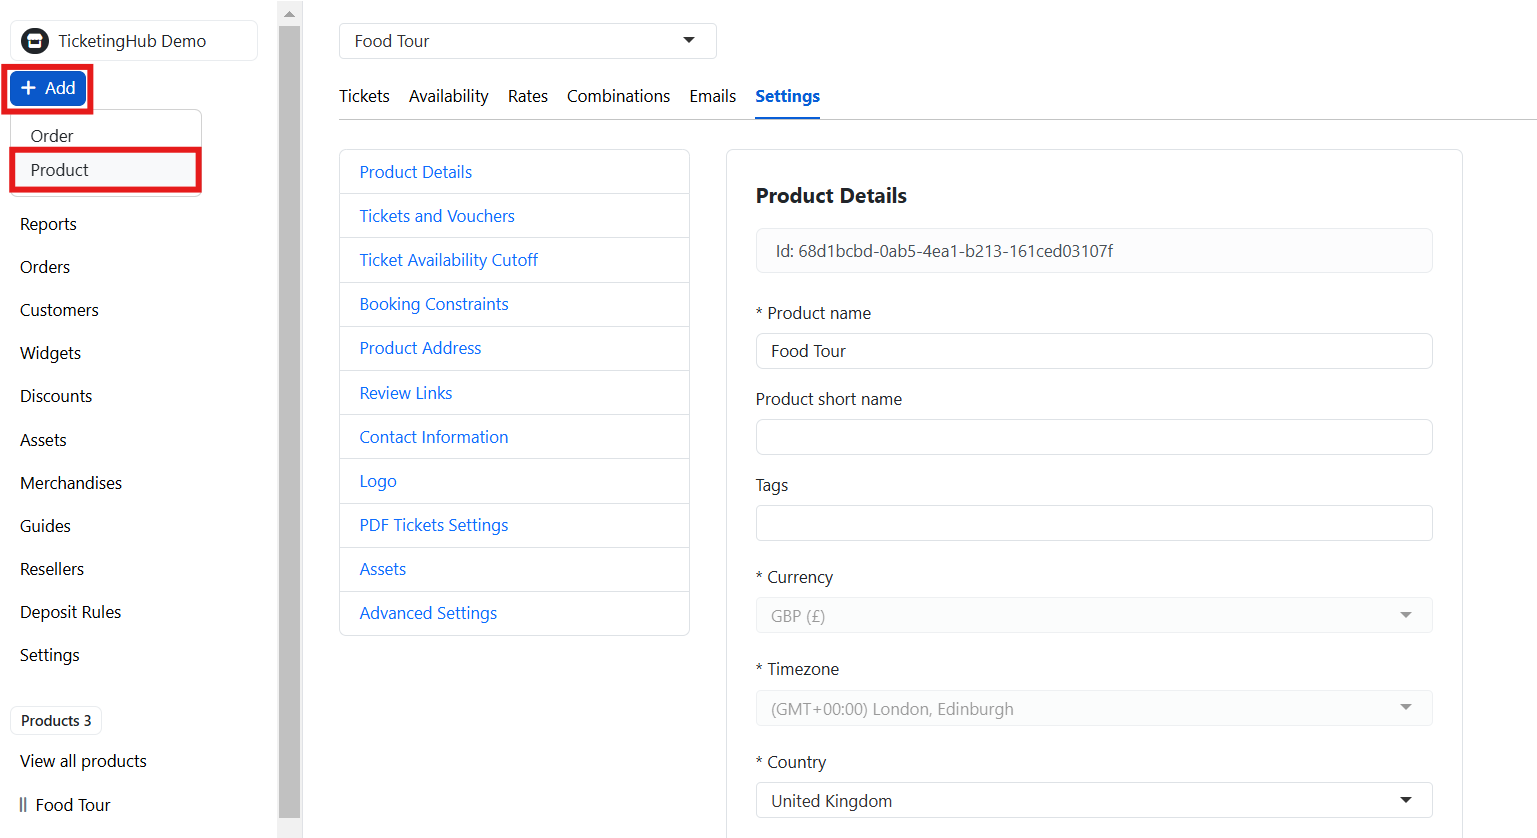
Understanding Product Settings
In TicketingHub, Products refer to tours, events, or venues. There are two ways to add a new product:
- **Create a new product **– Best for setting up an entirely new tour, event, or venue.
- Clone an existing product – Ideal if your new tour has similar settings to an existing one, allowing you to duplicate it easily.
Before proceeding, familiarize yourself with the essential product settings available in your dashboard:
- Tickets – Create different ticket types (e.g., VIP, Standard), sell add-ons, and customize booking questions.
- Availability – Set product availability based on seasons or exceptions.
- Rates – Define pricing, group rates, and occupancy-based rates.
- Combinations – Bundle products together and offer discounted rates.
- Emails – Manage email templates for confirmations, changes, and reminders.
- Settings – Adjust booking constraints, contact details, logos, and PDF ticket customizations.
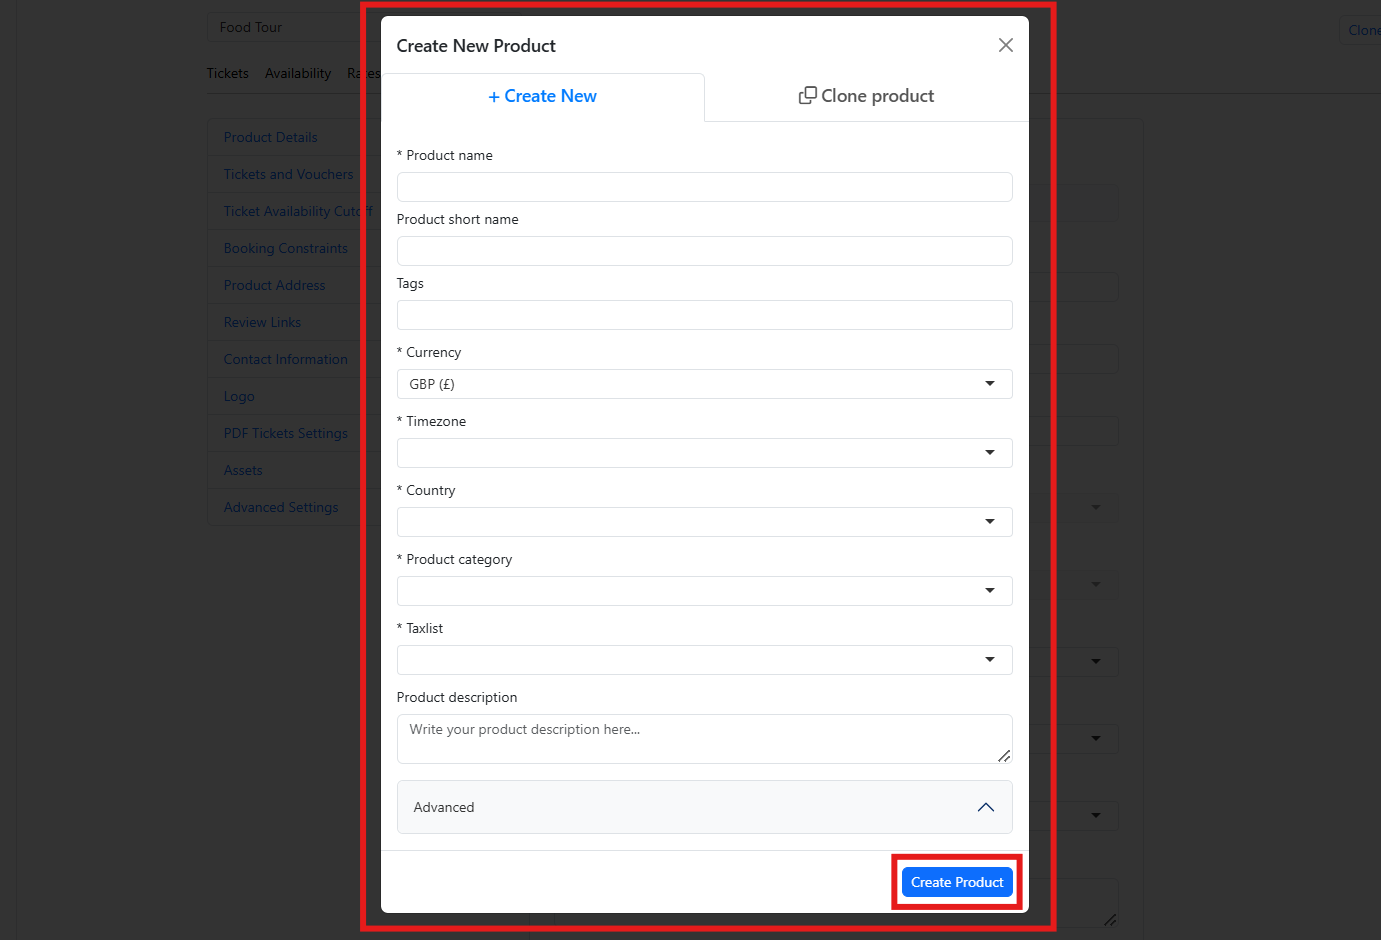
Method 1: Creating a New Product
If you are launching a completely new product, follow these steps:
- Log in to your Dashboard.
- Click on the +Add button from the left sidebar.
- Select Product.
- Fill out the required details in the New Product form:
**
- Name
- Short Name
- Currency
- Time Zone
- Country
- Category
- Tax List
- Description (Optional)
- Duration (under Advanced Settings)
- Click Create Product to save your new product.
Method 2: Cloning an Existing Product
If your new product shares the same settings as an existing one, cloning will save time. Here’s how:
- Log in to your Dashboard.
- Click on the +Add button from the left sidebar.
- Select Product.
- Click Clone Product in the top-right corner to open the cloning options.
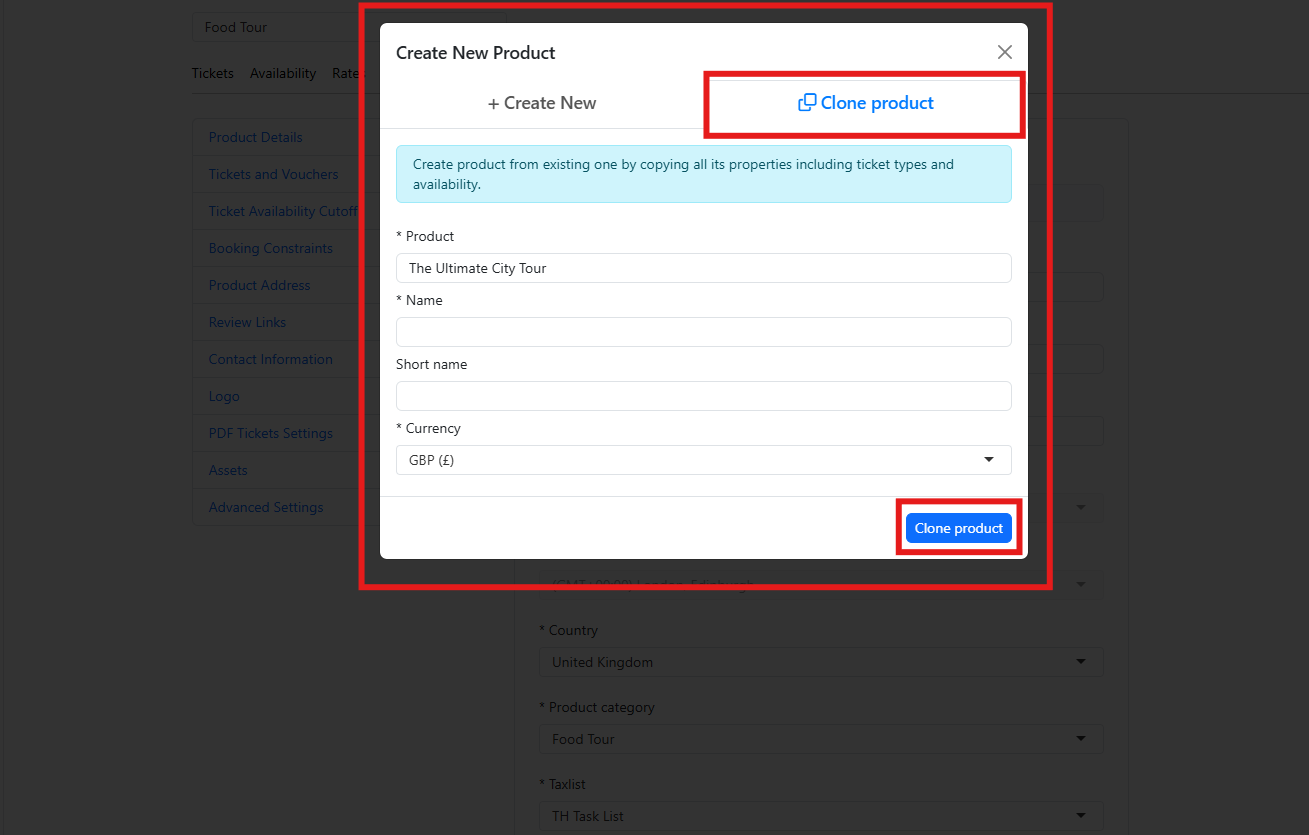
- Choose an existing Product from the dropdown list.
- Assign a new Product Name and Short Name.
- Select the appropriate Currency.
- Click Clone Product to finalize the cloning process.
For an alternative method of cloning products, check out our guide on How to Clone a Product.
Adding a New Venue
If you need to add a new venue, follow these steps:
- Identify the venue you’d like to replicate or set up as new.
- Determine the correct currency for the new venue.
- Choose the appropriate time zone to ensure accurate scheduling.
- Contact TicketingHub support with these details, and we’ll set up your venue accordingly.
From Idea to Live!
And just like that, you're all set! Whether you're launching a fresh product or replicating a successful one, TicketingHub makes the process simple and efficient. If you run into any roadblocks or need expert advice, our support team is always here to help—just reach out!
**
Updated on: 02/03/2025
Thank you!