How to Set Availability and Capacities
** Date Updated: Jan. 14, 2025
Managing your availability and capacities doesn’t have to feel like rocket science. With TicketingHub, you’ve got all the tools to create schedules, handle seasonal changes, and tweak capacities like a pro.
Whether you’re planning for a bustling summer season or just need to close shop for the holidays, this guide has your back. Let’s make your scheduling life a whole lot easier!
Steps to Set Availability and Capacities
1. Access the Product Availability Page

- Go to your Dashboard and select the product you want to set up.
- Click on Availability.
- Choose between two options:

- Seasons: To create recurring schedules.
- Exceptions: To override Seasons for specific dates or events (e.g., closures, changes in operating times, reduced or increased capacities).
2. Create a New Season
- Click on Add Season.
- Fill in the details:

- Name the Season (e.g., "Regular Schedule").
- Start date.
- Optional: End date or leave it open-ended.
- Add time slots and capacities:
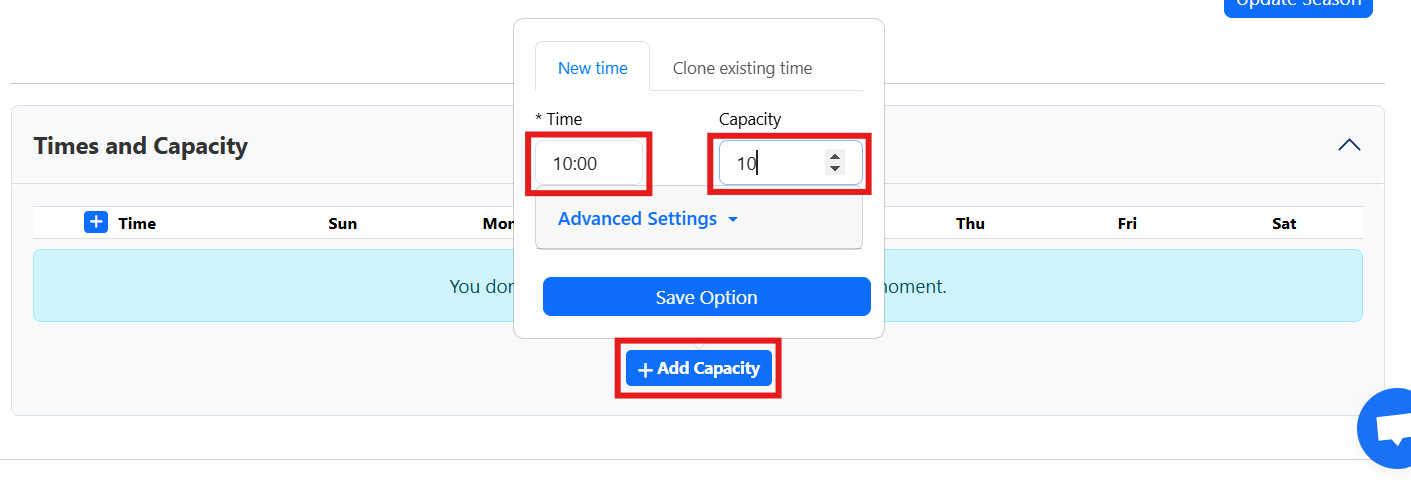
- Example: Add 10 AM and 2 PM slots, each for 10 people.
- Customize the schedule:
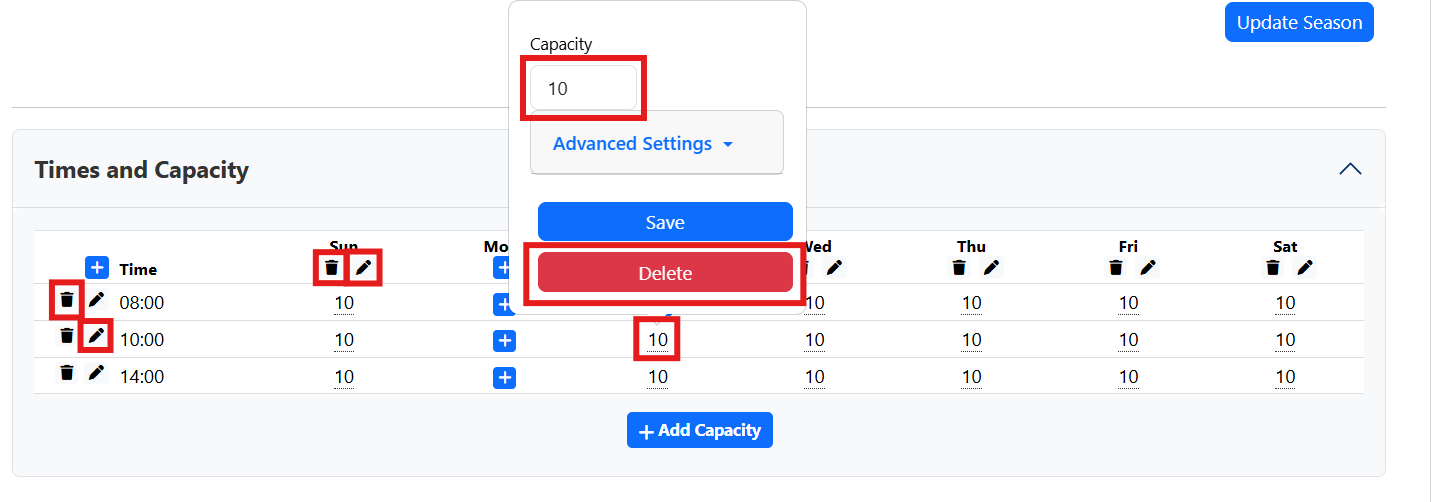
- **Edit **times or capacities.
- Remove undesired days or times (e.g., Mondays or all early mornings).
- Click on a specific capacity to modify it or remove it. (e.g., Tuesday mornings)
- Save the changes.
3. Clone an Existing Season
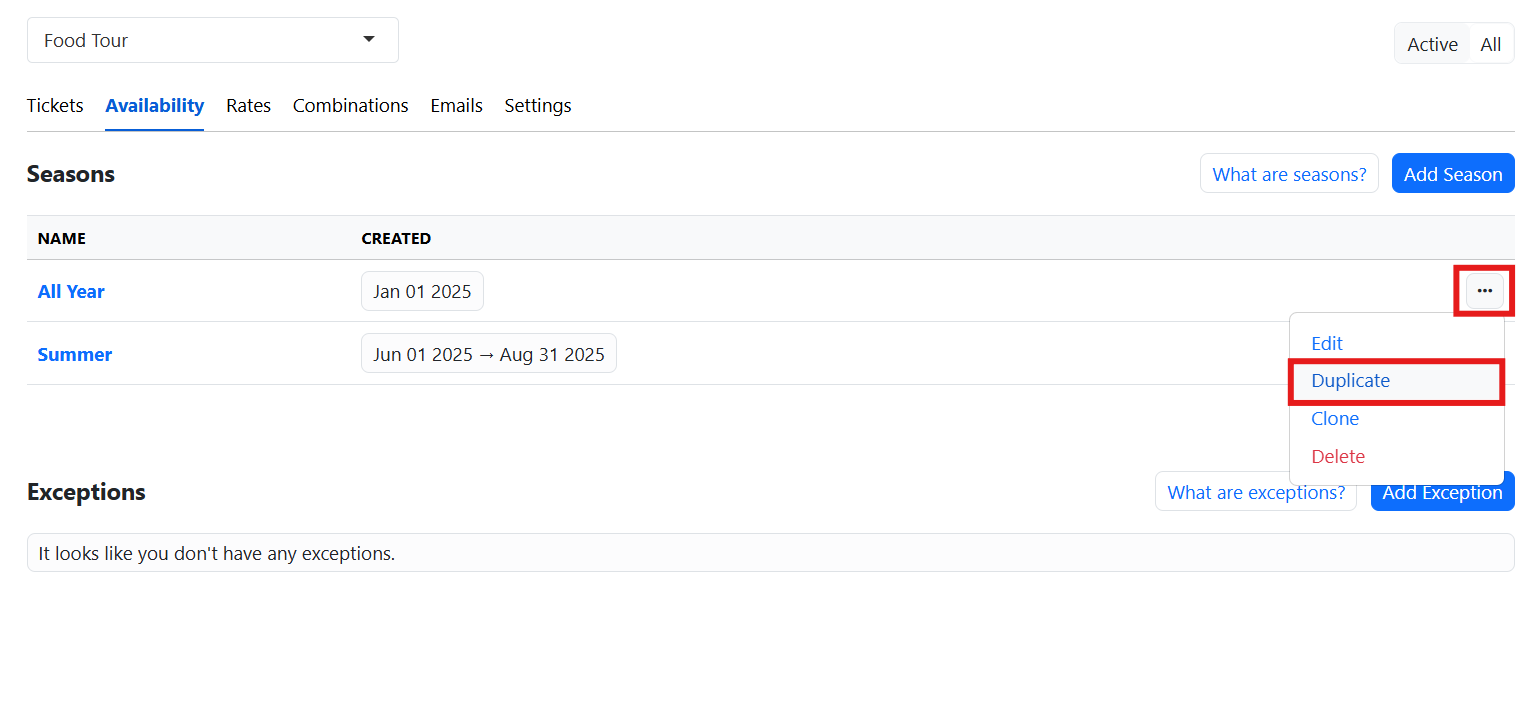
- Find the Season you want to duplicate and click the three-dot (meatballs) menu.
- Click on Duplicate.
- Fill in the Season name, start date, and the optional end date.
- Times and capacities will be duplicated, so make adjustments:
- Modify days, times, and capacities as needed.
- Save the changes.
4. Create an Exception
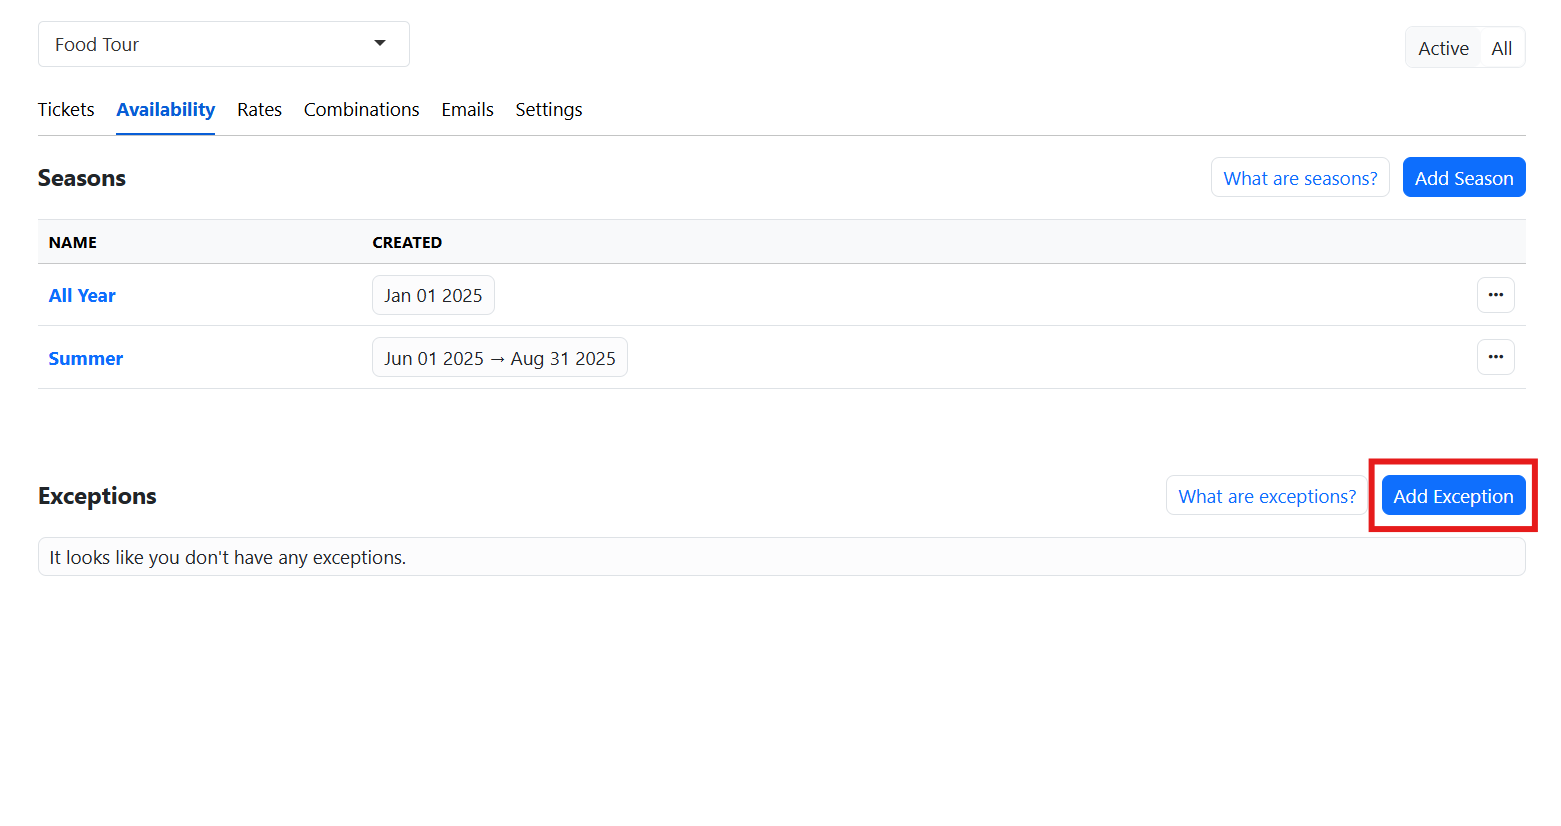
- Go to your product’s availability page and click Add Exception.
- Fill in the details:
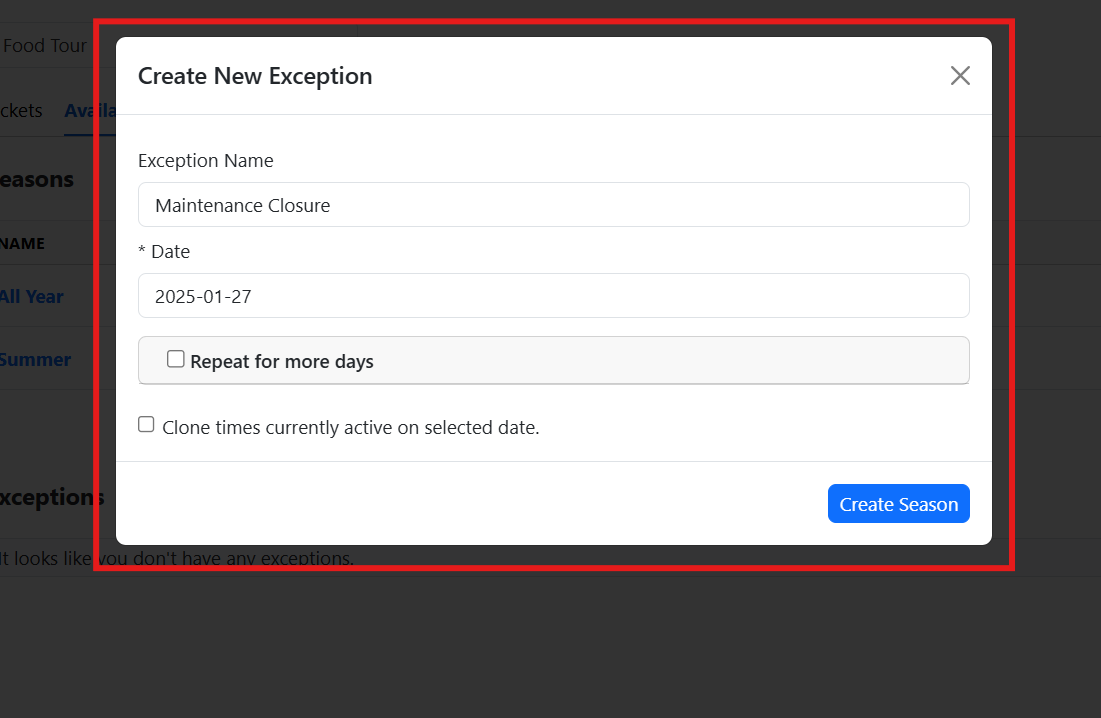
- Name the exception (e.g., "Maintenance Closure").
- Select the date. (e.g., on January 27th)
- Optional steps:
- Tick Repeat for more days if you wish to continue it for multiple days.
- Tick Clone times currently active to copy all active time from different Seasons. Or leave it blank to start from scratch.
- Adjust as needed:
- To close completely, leave the schedule blank.

- To adjust times, add new slots or update capacities (e.g., start at 11 AM instead of 9 AM or increase capacities from 10 to 20).
5. Review and Modify Availability
- On your Dashboard, click on Availability.

- Use filters to view schedules by product and/or date range.
- Review your setup:
- Check your regular Seasons.
- Confirm any Exceptions or one-time changes.
6. Make Quick Adjustments
- Find the specific time slot you want to edit.
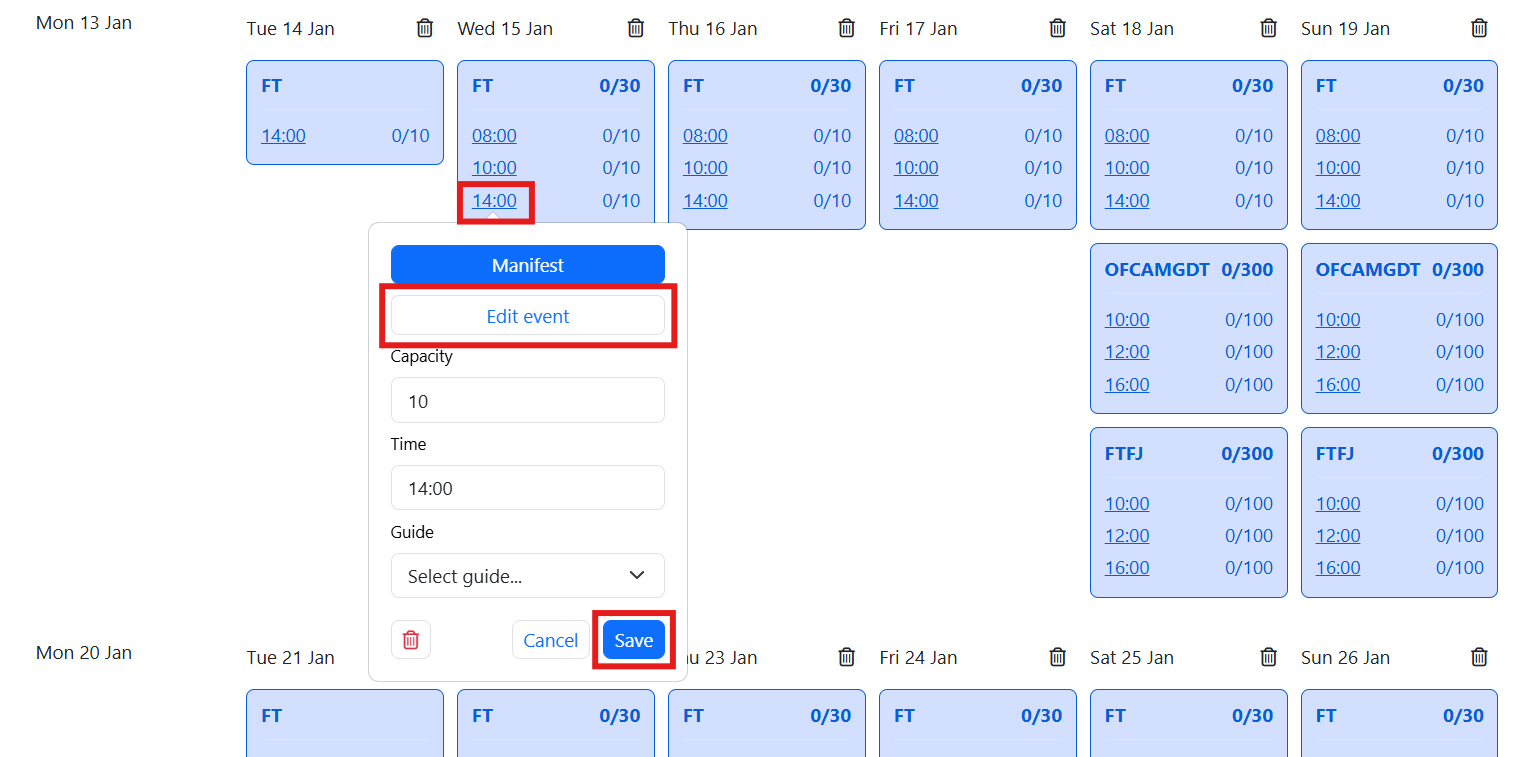
- Click the slot to open the edit menu.
- Make your updates:
- Modify capacity, timing, or assign a guide
- Save changes.
- Delete availability (if needed):
- Click the red trash bin icon.
And just like that, you’re now a scheduling wizard! With Seasons, Exceptions, and quick edits, you’re ready to keep things running smoothly. If you hit a snag or need extra help, our support team is just a message away. Happy scheduling!
**
Updated on: 14/01/2025
Thank you!