How to Create Tickets
Date Updated: Feb. 11, 2025
Hey there, TicketingHub trailblazers! Ready to simplify your ticketing life? This handy guide is crafted just for you—tour operators and activity gurus eager to streamline ticket creation on our platform.
Whether you’re setting up shop for the first time or fine-tuning your process, we’ll walk you through creating tickets that not only look good but also work like a charm. Dive in, and let's make your ticketing process as exciting as your events!
How to Create Tickets |
|---|
Understanding Key Components
Before you start creating tickets, it’s important to understand the components you’ll work with:
- Tickets: These are the different types of tickets you offer, like Adult, Child, Senior, or Student tickets. Also included are special formats like E-ticket, Group Ticket, Early Bird, or Advance Ticket.
- Ticket Categories: Use this to modify ticket prices and features for categories like Standard Tickets, VIP Tickets, or Group Tickets.
- Extras: Additional products or services you can sell with your tickets, such as a meal or a souvenir.
- Questions: Set up queries that customers need to answer during the booking process, like dietary restrictions or special accommodations.
Creating Tickets: A Step-by-Step Guide
1. Access Your Product

- Navigate to the Products section on the left side of your dashboard.
- Select the product related to the tour you are offering.
2. Go to the Tickets Tab
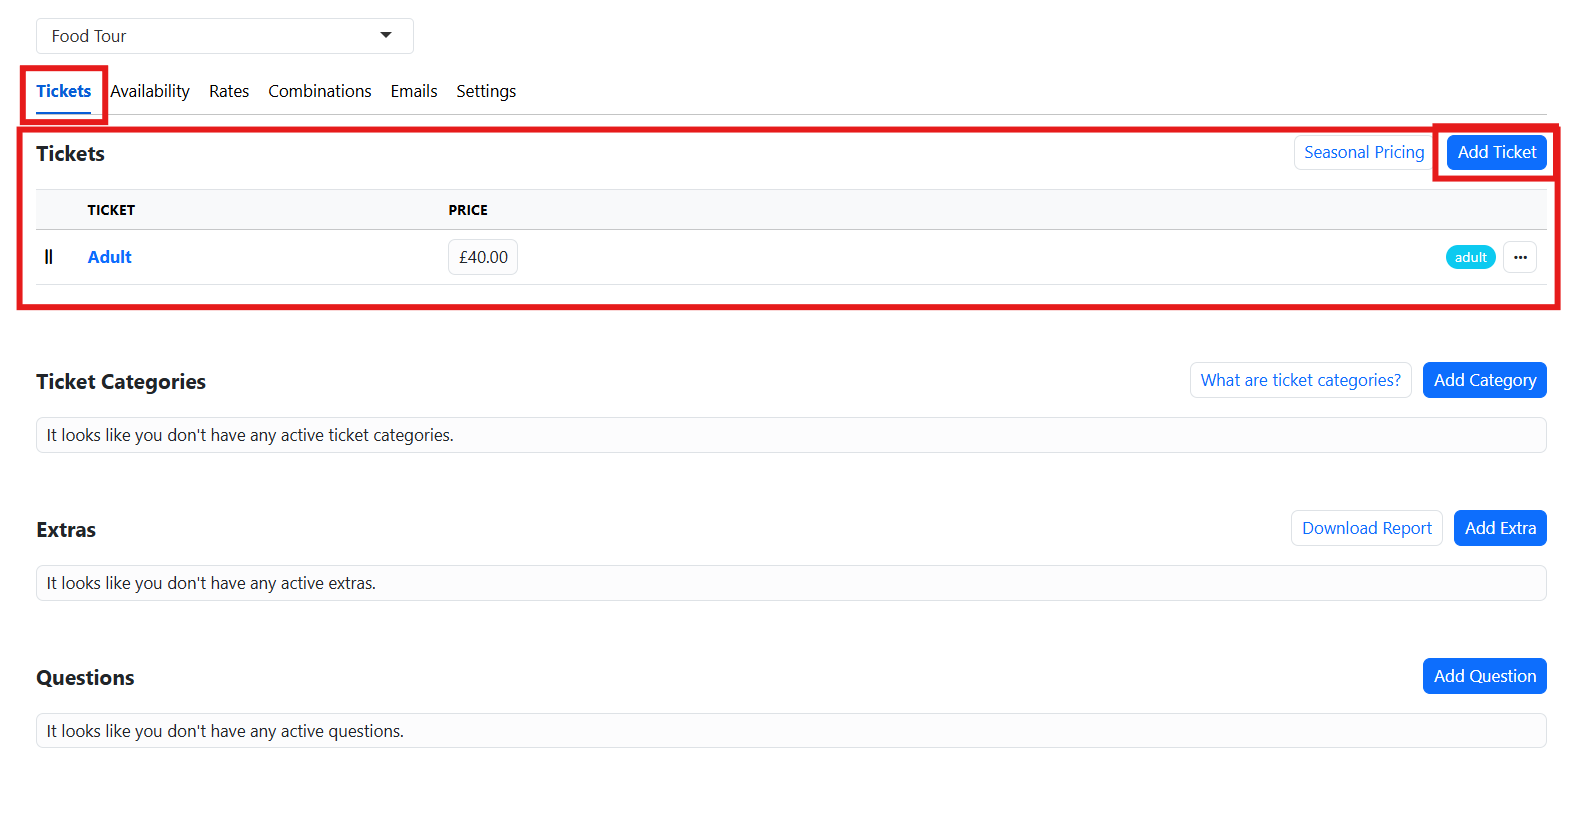
- On the Tickets dashboard, you can see the Tickets tab.
- Click on Add Ticket in the upper-right corner.
3. Fill in the Details
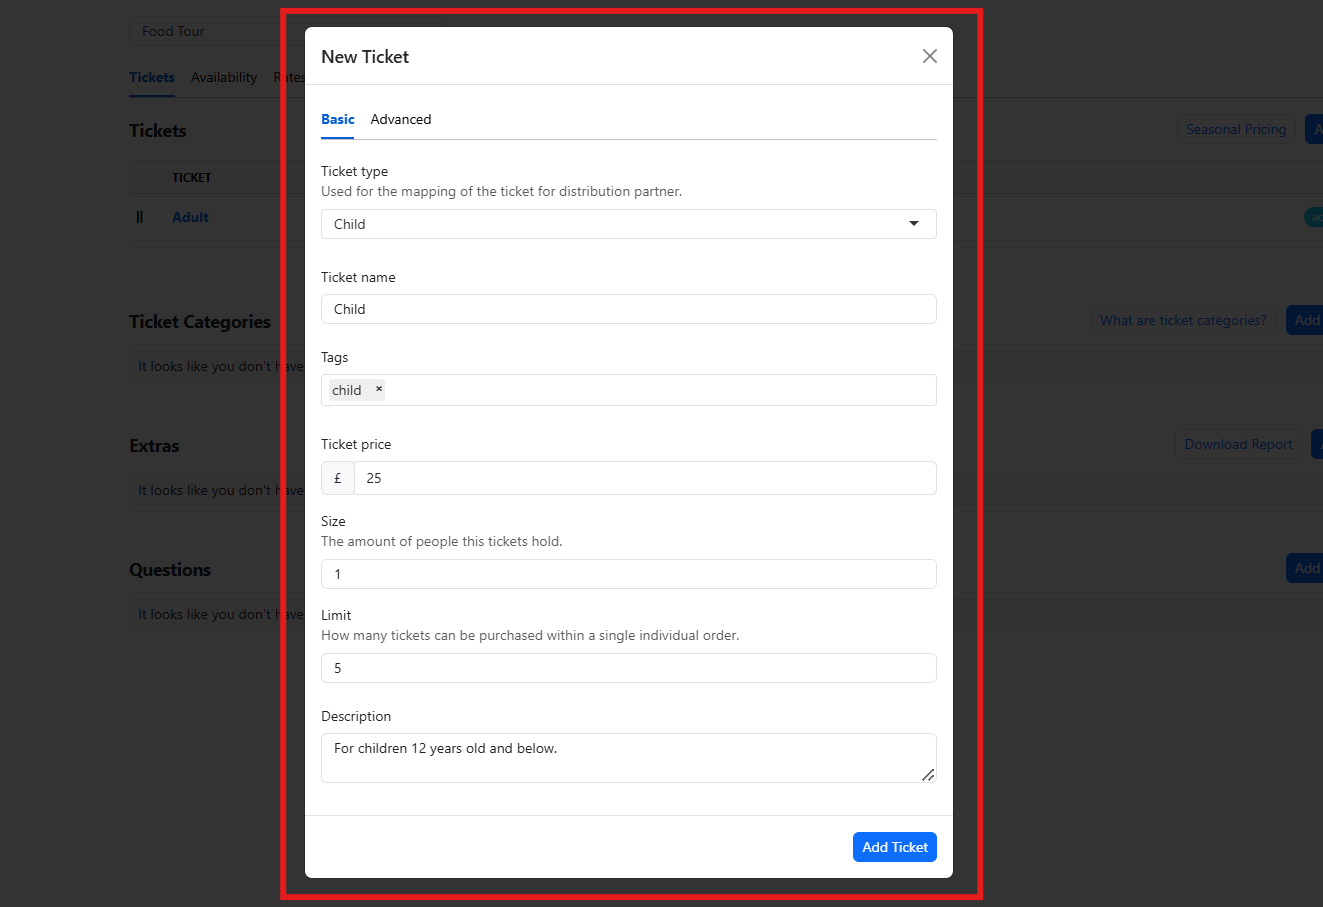
- Input details such as ticket type, name, price, and other essential information.
- In the Description box, clearly describe who the ticket is intended for, its validity period, or any other important details.
- Click Add Ticket to complete the setup.
4. Customize Ticket Features

- Within the Tickets dashboard, you can adjust features like Ticket Categories, Extras, and Questions to match the specifics of your tour.
- Add each feature as necessary and follow the prompts.
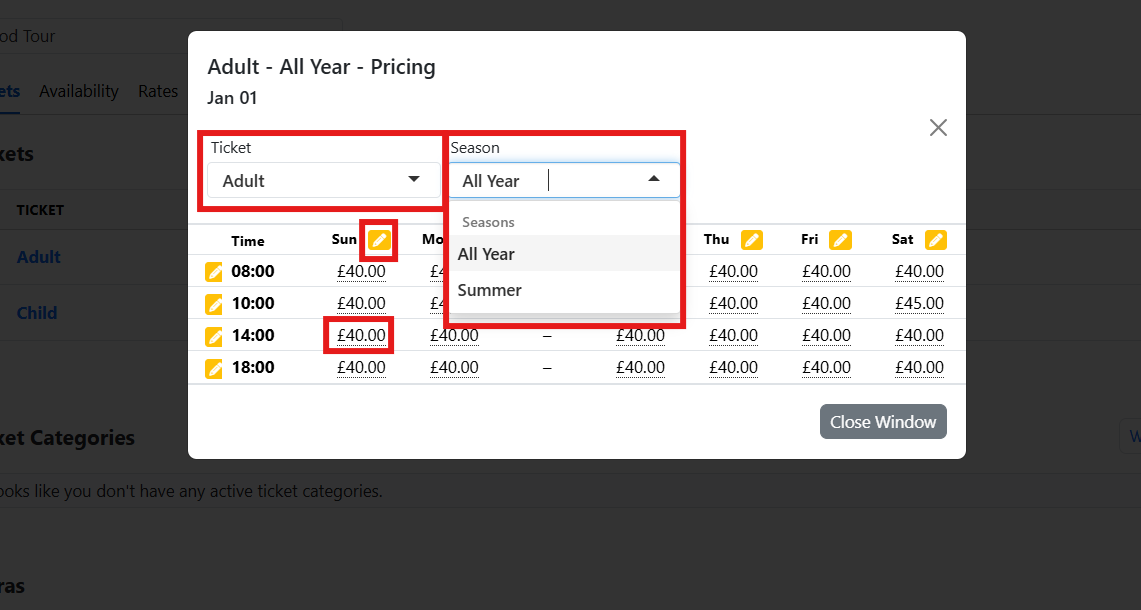
5. Implement Seasonal Pricing

- Utilize the Seasonal Pricing feature under the Tickets tab to adjust prices based on different seasons.
- Choose the Ticket type and Season you wish to adjust.
- Click on the yellow pencil icon or a specific amount to edit the price.
Discover how to establish Seasons by reading our step-by-step guide, How to Create Availability Using Seasons.
Tickets, Sorted!
And there you have it—ticket creation made easy! With these steps, you’ll whip up perfect tickets that reflect the unique vibe of your tours or events.
Got questions? Need a hand? Our support team is on standby, ready to jump in and help out. Don’t forget to check out our other help desk articles for more pro tips and tricks. Happy ticketing!
Updated on: 11/02/2025
Thank you!