How to Use Provisional Invoices for Bookings
Updated: Feb. 27, 2025
Need to manage those group or corporate booking payments without immediate transactions or sharing sensitive card details? No sweat! TicketingHub’s slick provisional invoice feature is here to save the day.
This guide is tailor-made for anyone looking to streamline invoicing with just a click—consider it your financial magic wand. Whether your client’s accounting department needs a gentle push or they prefer not to share card details, this tool keeps things simple and professional.
How to Use Provisional Invoices for Bookings |
|---|
Steps to Use Provisional Invoices for Bookings
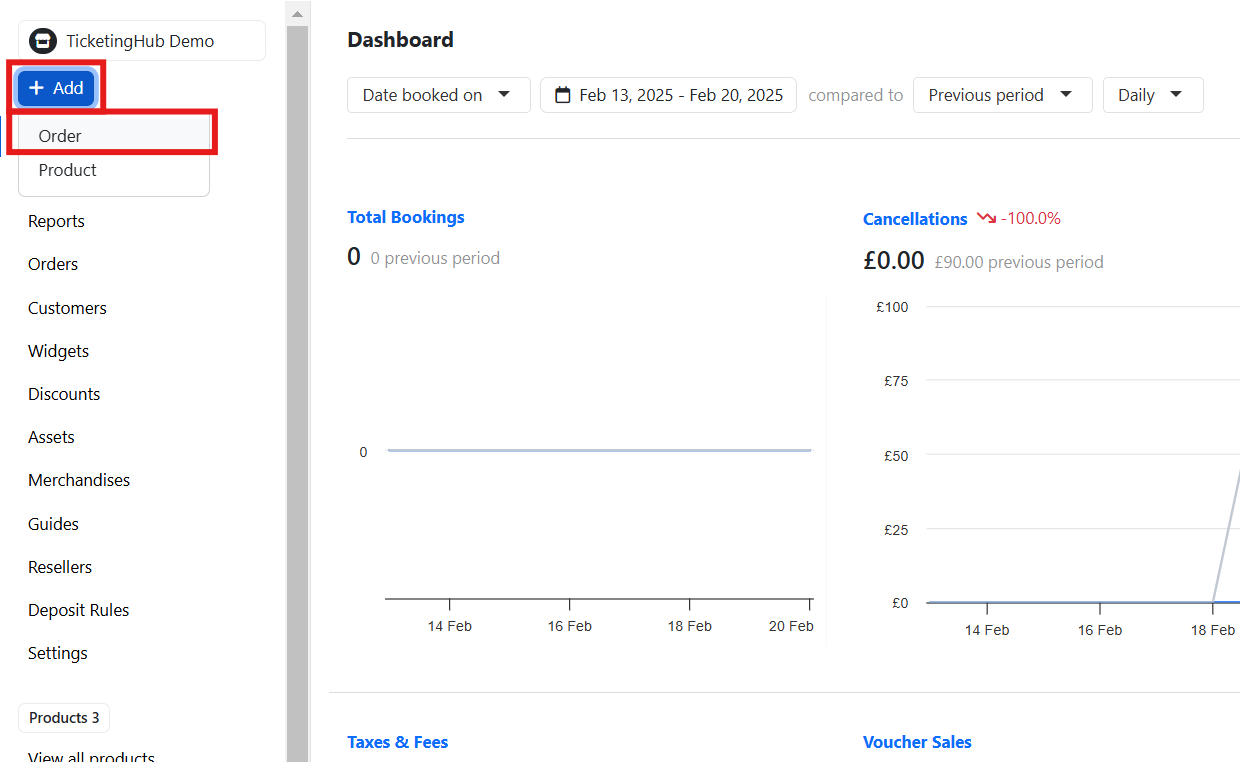
1. Initiate a New Order
- Navigate to your TicketingHub dashboard.
- Click the +Add button and select Order to start the process.
2. Complete Booking Details
- On the booking page, click Add Booking.

- Fill in the booking details. If you are offering a discount, adjust the price or rates accordingly.
- Click on Update Booking to save.
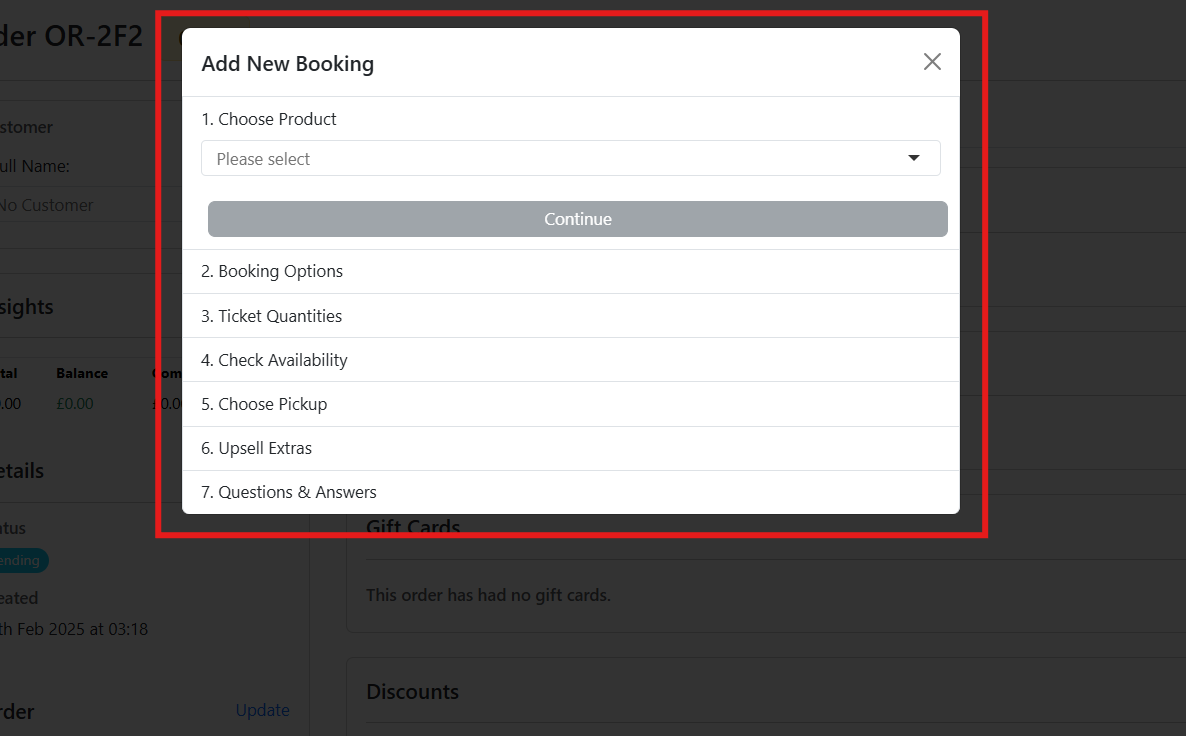
For more details, see our guide on How to Add a Booking.
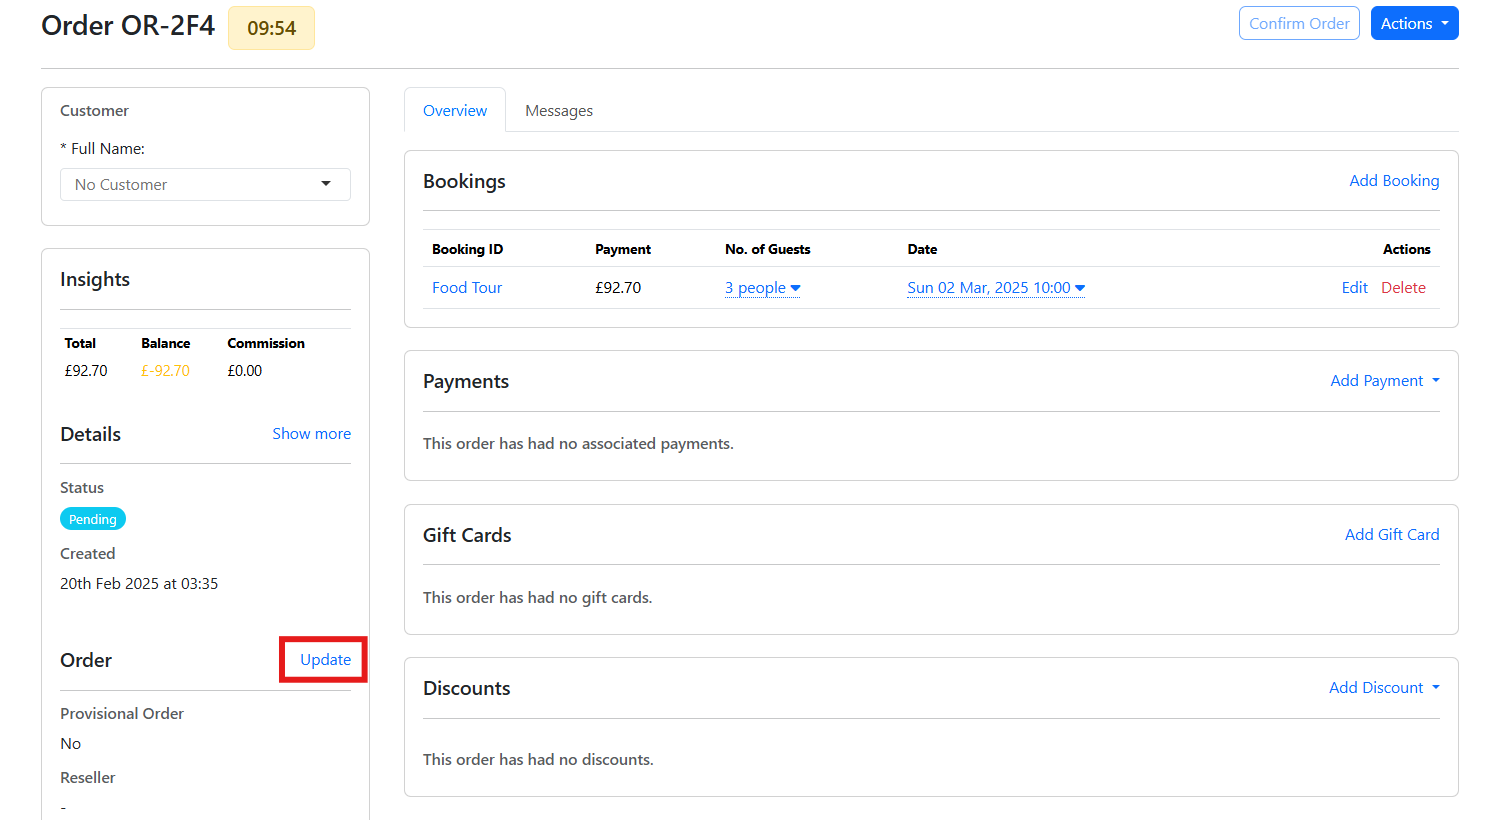
3. Update the Order
- Still on the booking page, find the Order box on the right side.
- Click on Update.
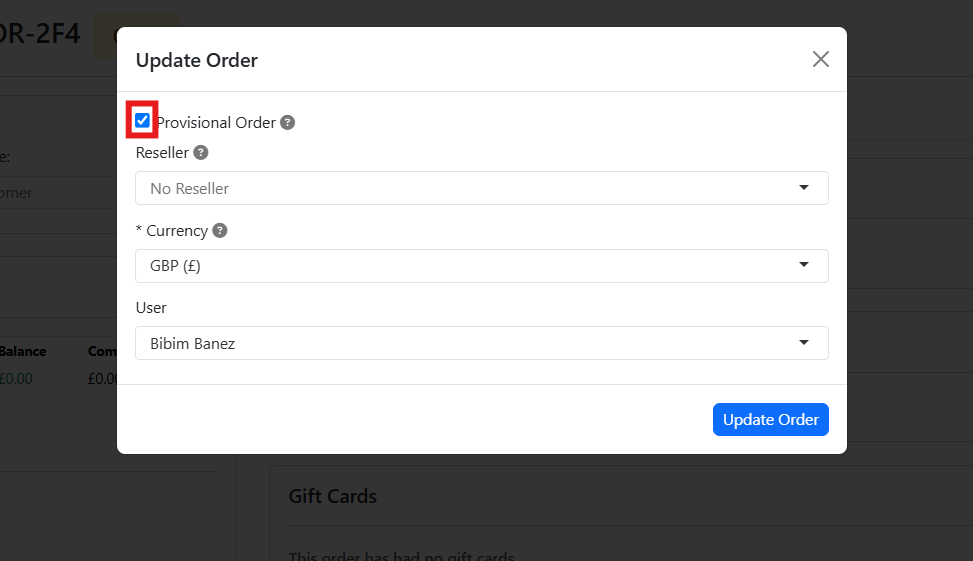
- Check Provisional Order to change the order status.
- Click Update Order to confirm it as provisional.
4. Confirm the Order
- Click Confirm Order to finalize the process.

5. Customize the Invoice and Email
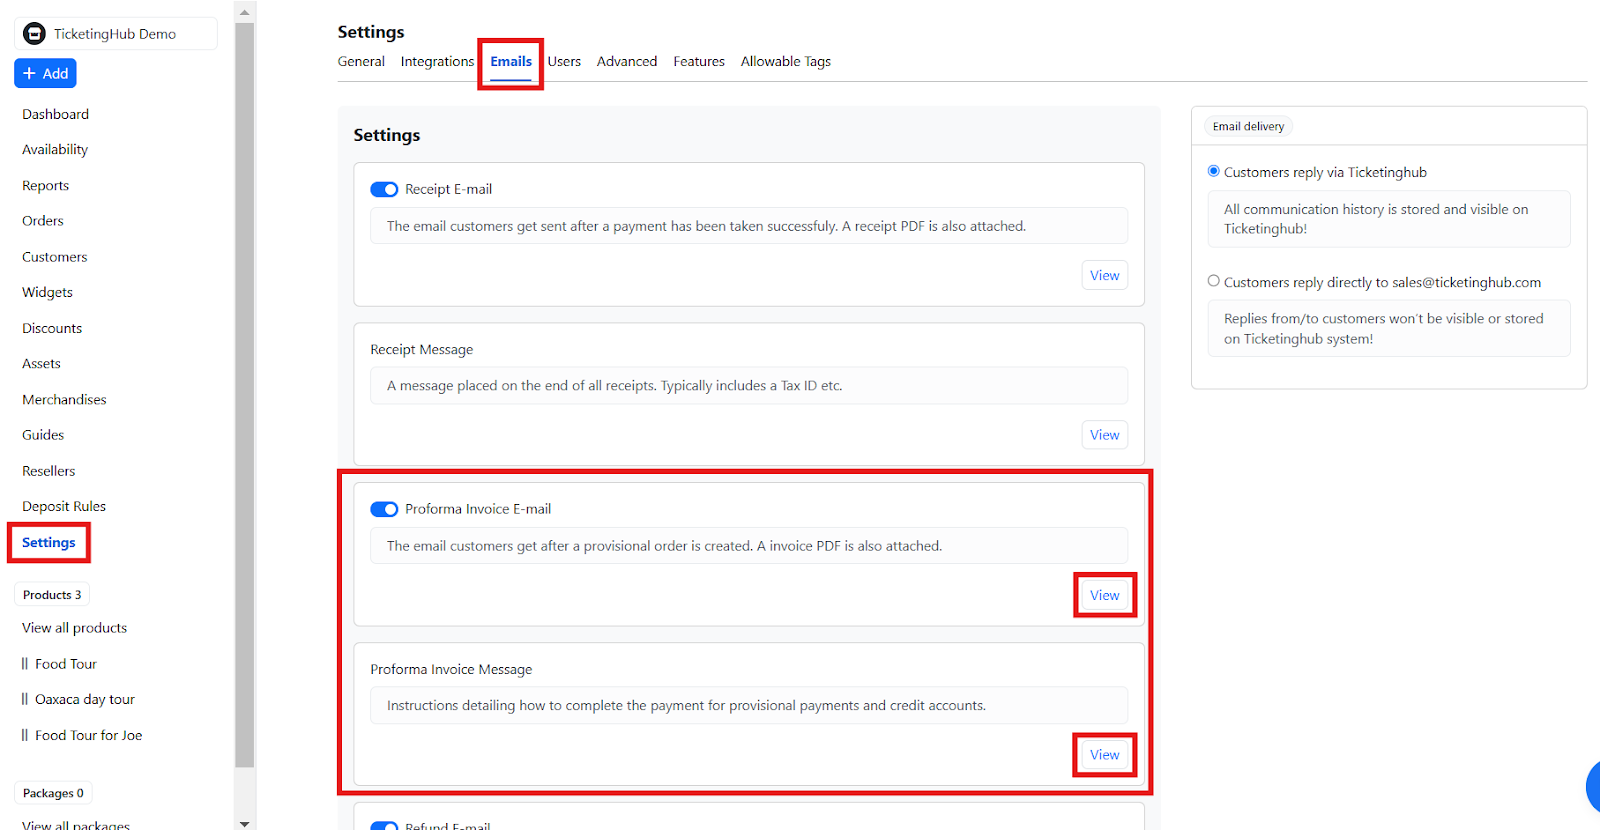
- In your dashboard, go to Settings.
- Navigate to Emails.
- Find the Proforma Invoice E-mail tab.
- Click View.
- The Edit button will appear. Click it to customize the invoice and the accompanying email as needed.
A Smooth Finish
And that’s a wrap! Just follow these five straightforward steps to not just send invoices but also enhance the payment experience. It’s as smooth as your favorite jazz track. Wave goodbye to cumbersome processes and welcome secure, hassle-free payments that make everyone’s life easier—your accountant included!
If you have any questions or need further assistance with provisional invoices, our team is just a click away to help you smooth out any wrinkles!
**
Updated on: 27/02/2025
Thank you!